
Three years ago I told you about the then-new Radiant Photo 1 plug-in and standalone app which was designed by photographers for photographers, with the goal of getting your images color corrected with minimal interaction.

Now we have the recently released Radiant Photo 2 (currently at v2.1) which takes this experience to the next level! AI is involved, but not generative AI, so your privacy and original pixels are respected and non-destructively locally processed on your own device. Your creativity is enhanced, not replaced.
Radiant Photo 2 works very quickly to bring your challenged images out of the murk with its auto-detecting of photographic genres and immediate application of needed fixes, but you also have full control over the corrective as well as creative results.
There’s a lot to say about what’s possible here, but let’s just get straight to seeing the results! I’ve prepared a wide section of examples drawn from my own stash of images, captured on film (slides and negatives) as well as digital (consumer and DSLR). All of them needed some sort of enhancement to make them presentable.
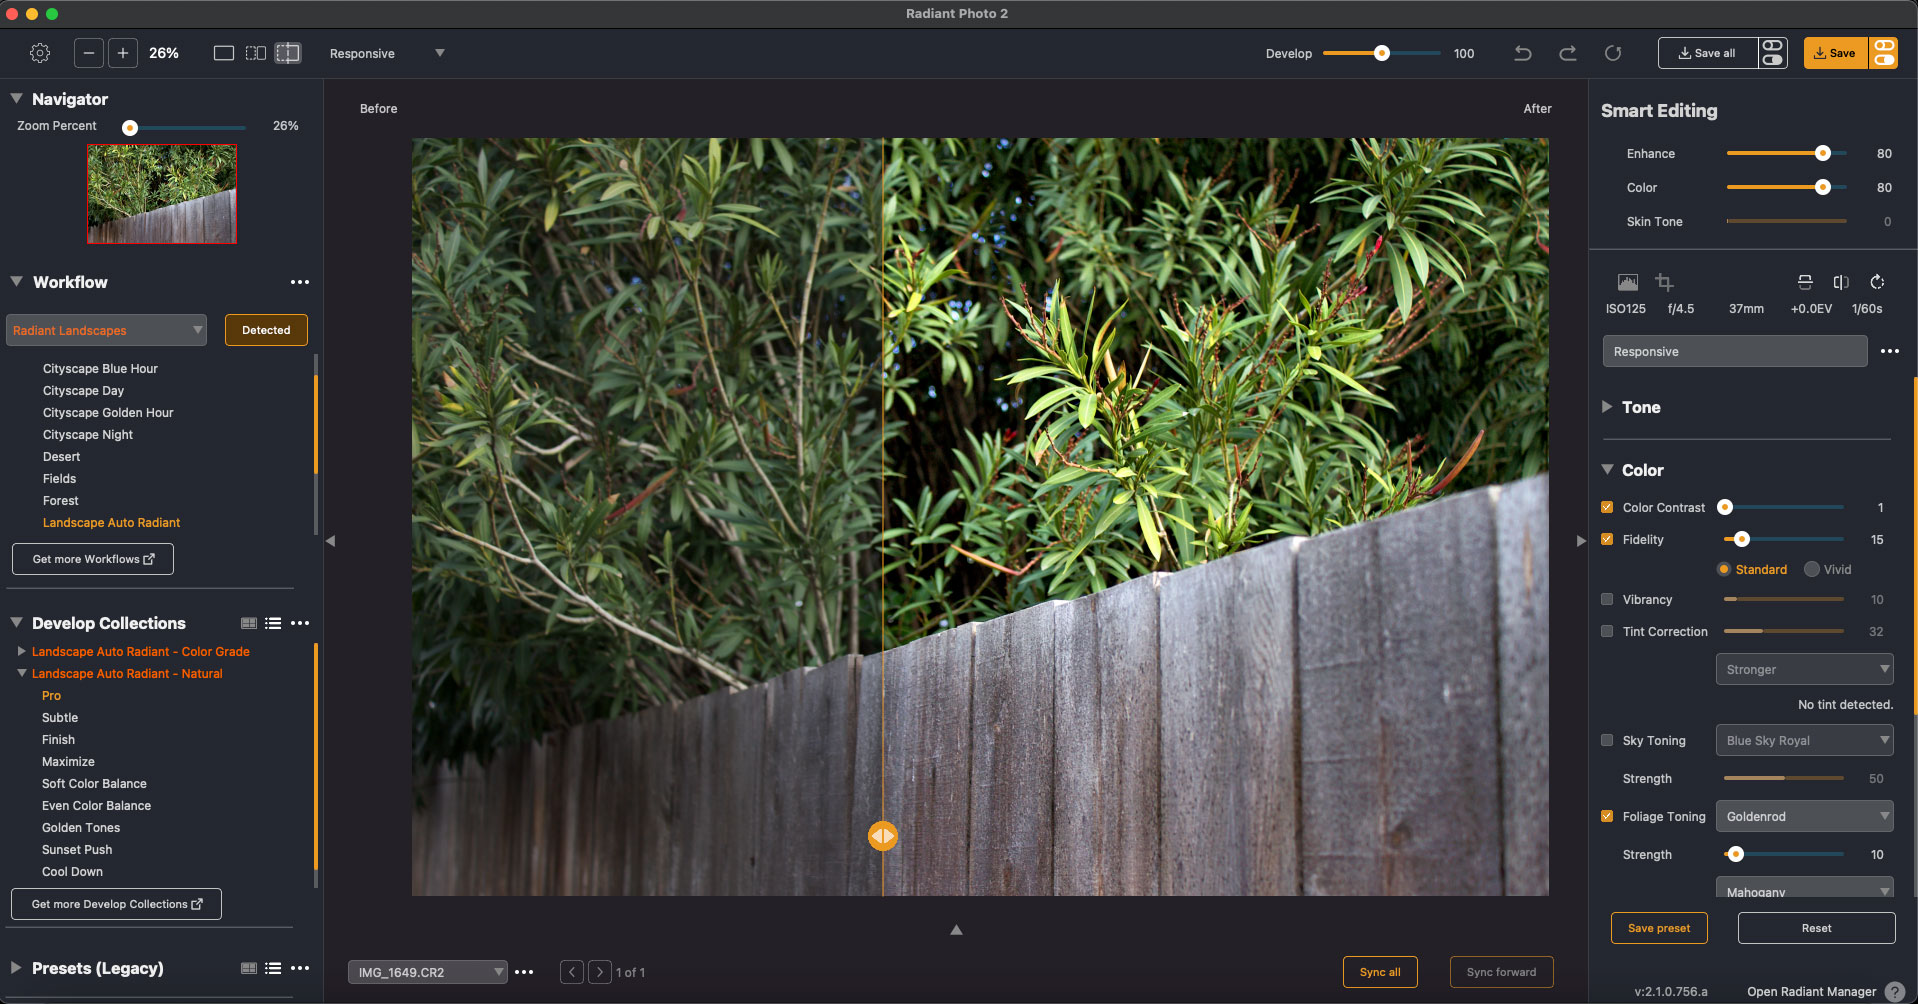
Let’s start with a couple of CR2 RAW images. By the way, in each screenshot (which can be viewed at 100% in a different tab or window) you can see the particular Workflow applied (left side) as well as some of the settings I adjusted on my own (right side).
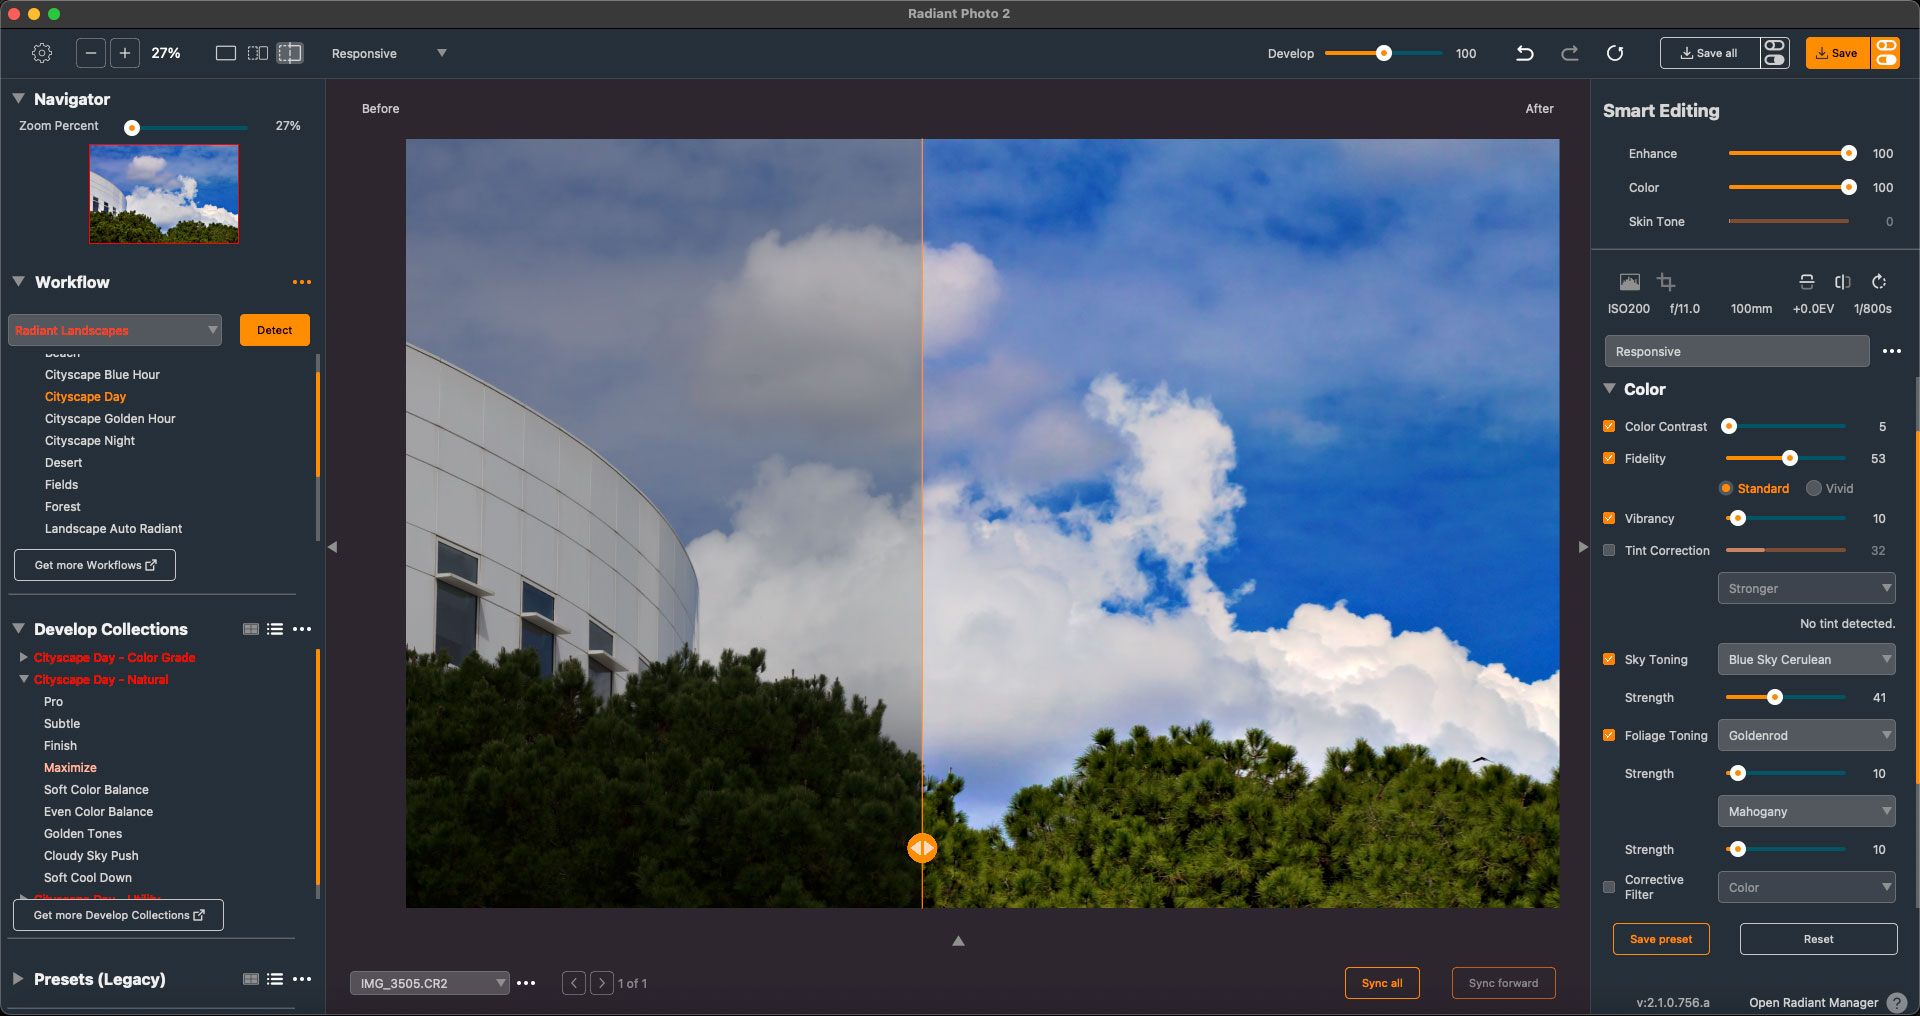
In the above image, notice how Radiant Photo 2 popped the trees out of the shadows and enhanced the sky and clouds. The example below shows how foliage and wood are brightened:
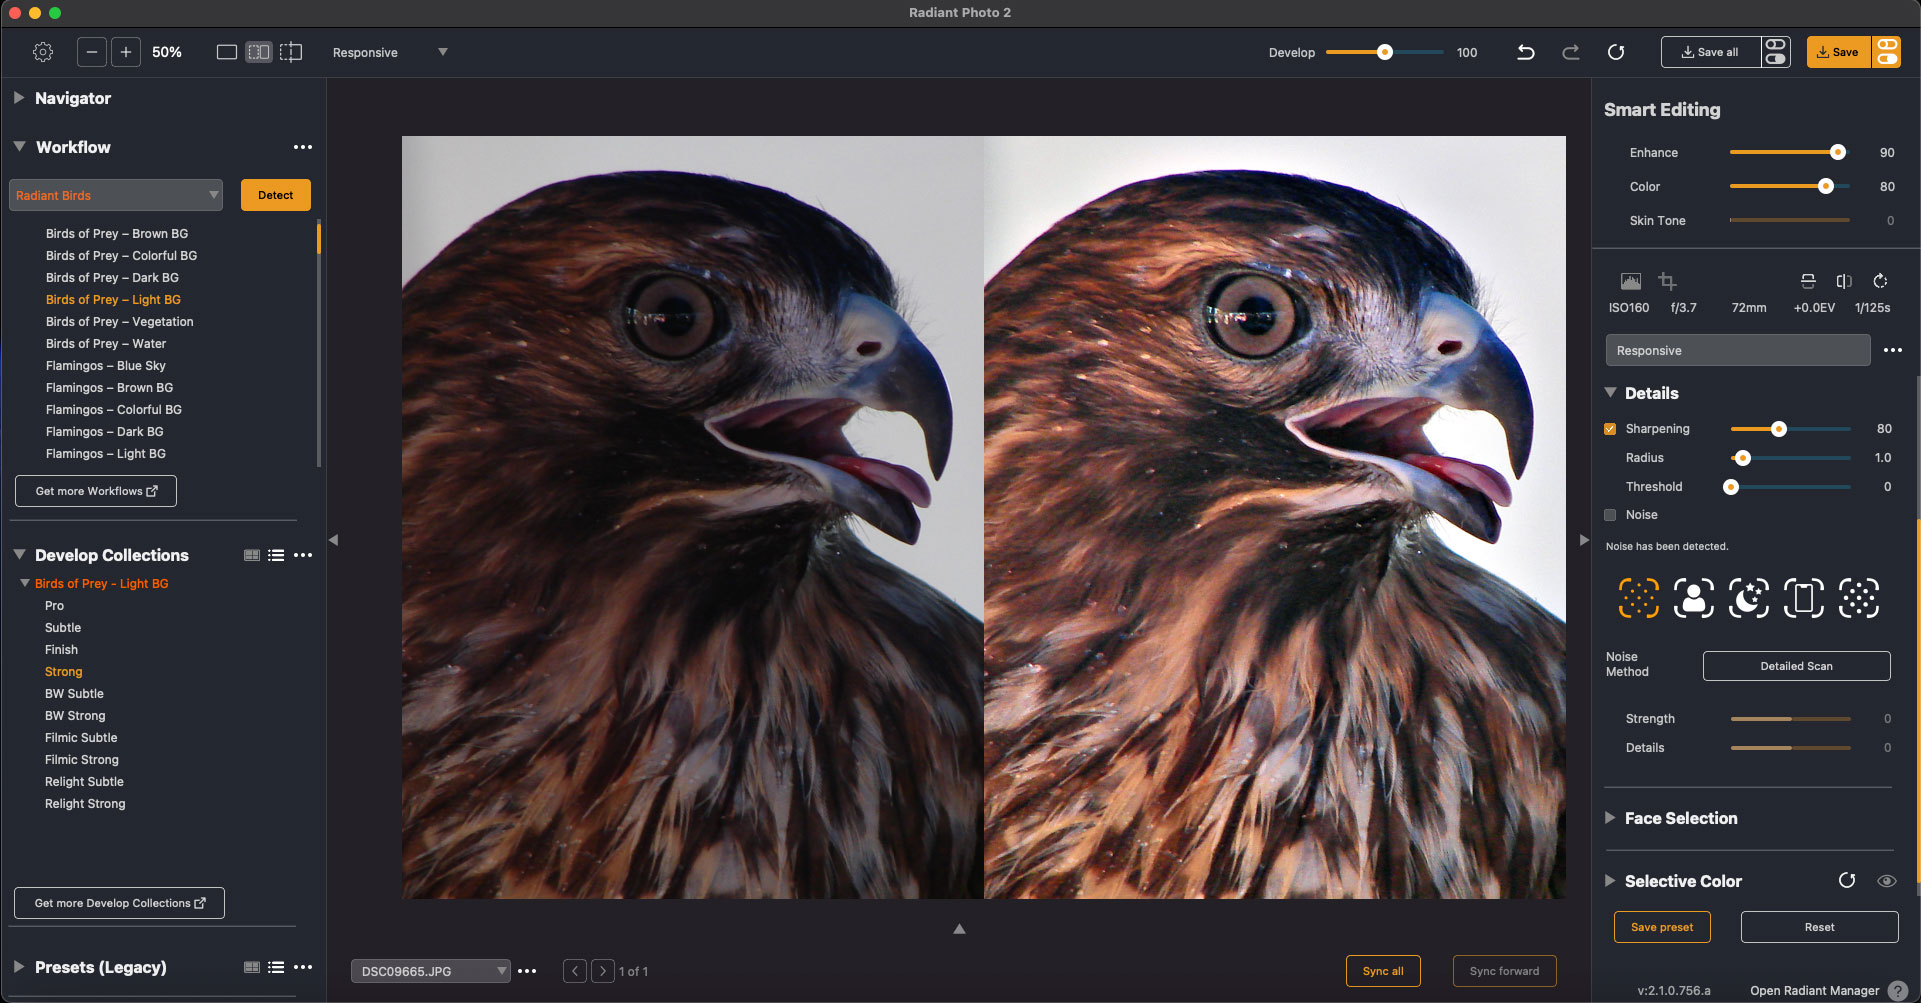
Next we switch to consumer-grade 4- and 6-megapixel digital images going back a decade or two, when I should have been using a DLSR but wasn’t ;-). This image of the hawk benefits from my installation of several additional Workflows which are offered by the Radiant developers as part of The Ultimate Package. In the left column you can see examples of the granularity of the available “Birds Workflow” options:
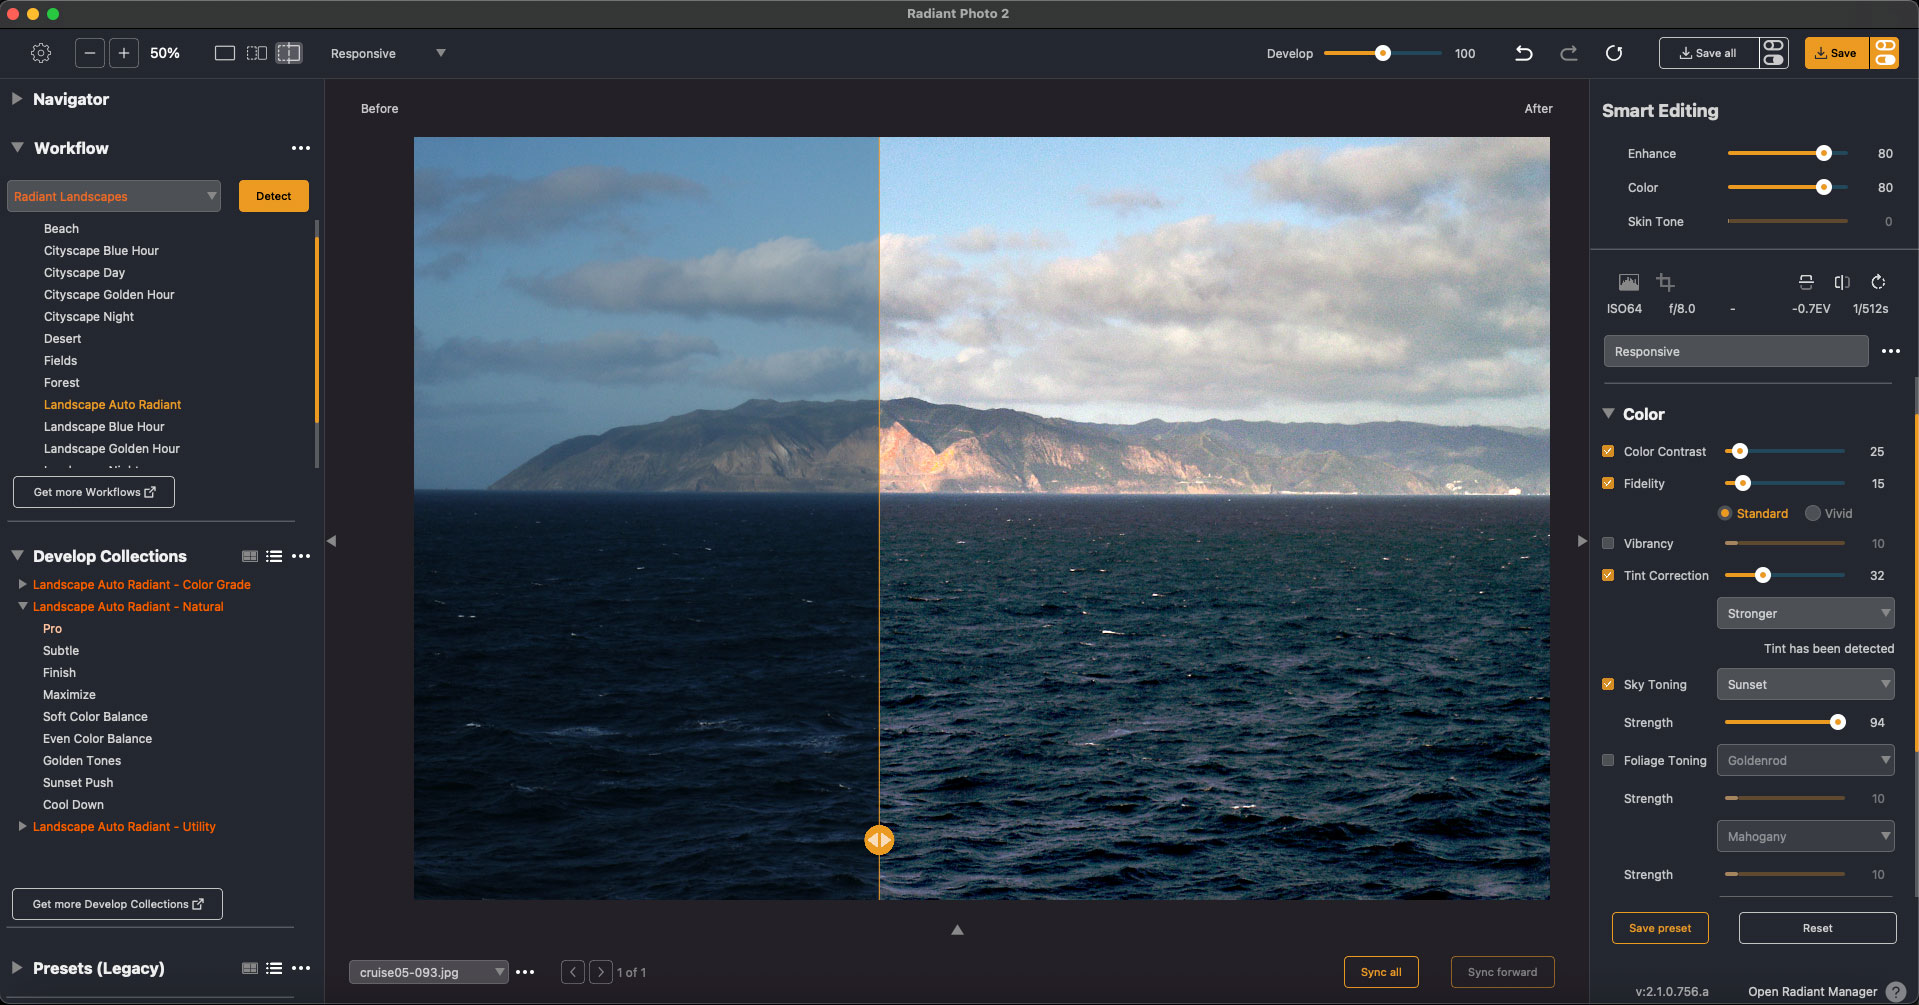
Let’s now look at a few scenics that greatly benefitted from the Radiant Photo 2 touch. The first is a shot of Catalina Island from the water. The original is dull and grey while the enhanced version makes the weather perfect for sailing:
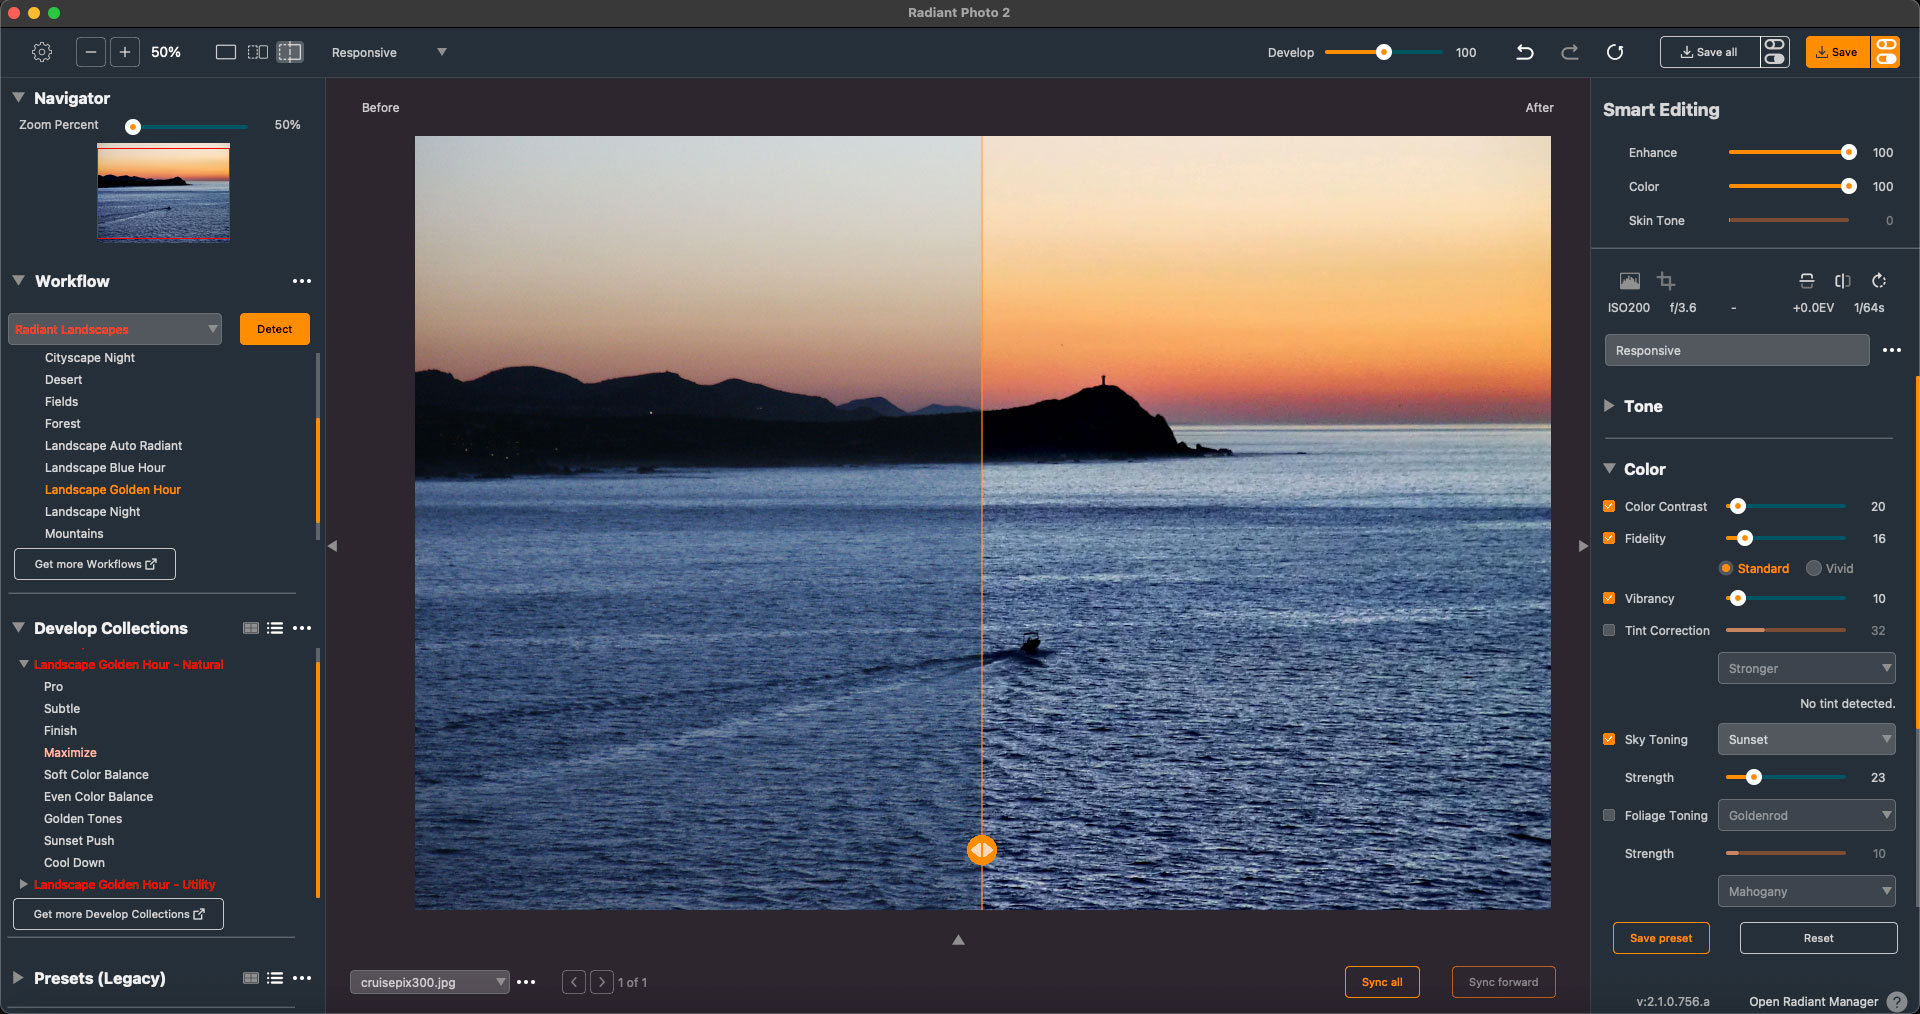
The next example is a sunrise image shot down in Mexico, probably with the same crappy camera… Radiant Photo 2‘s Landscapes Workflow was used along with manual settings (such as Sky Toning) to welcome a new and better day:
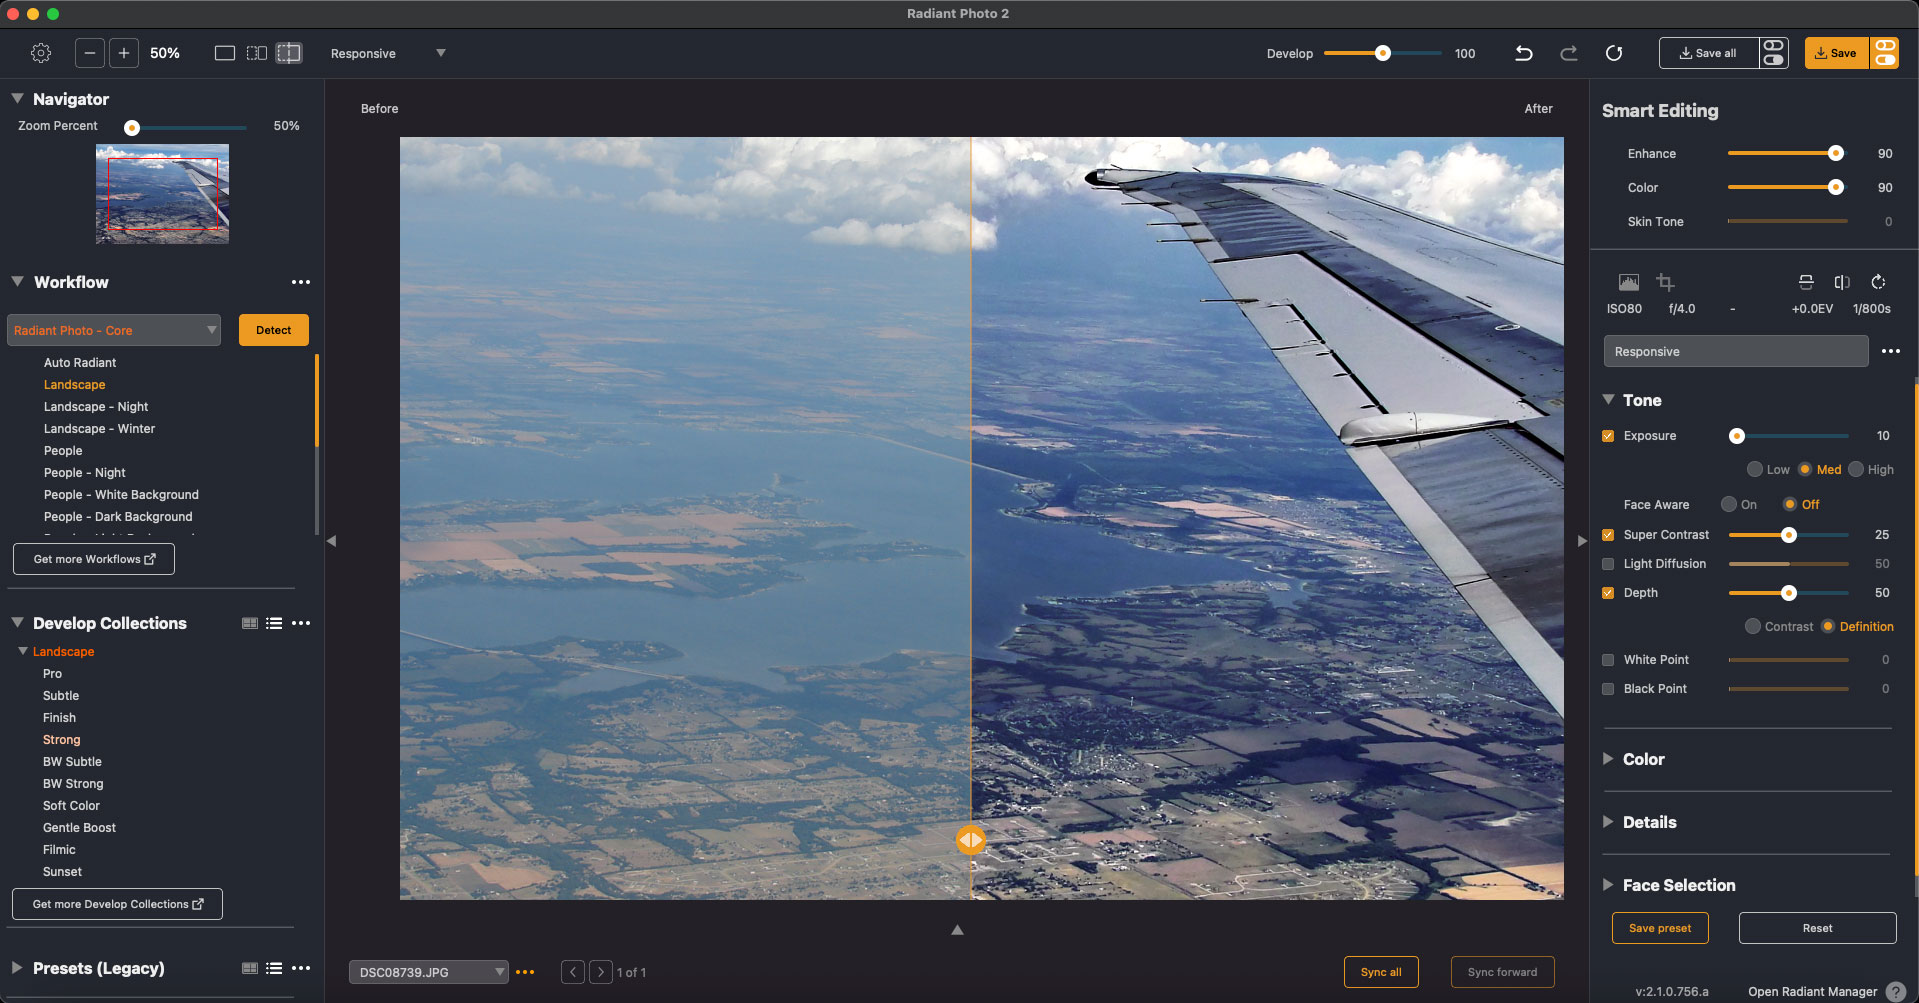
Now we get up in the air somewhere over Flyover Country and look down through the inevitable haze… Radiant Photo 2 popped this image right into shape using the Core Landscape settings along with some Tone work:
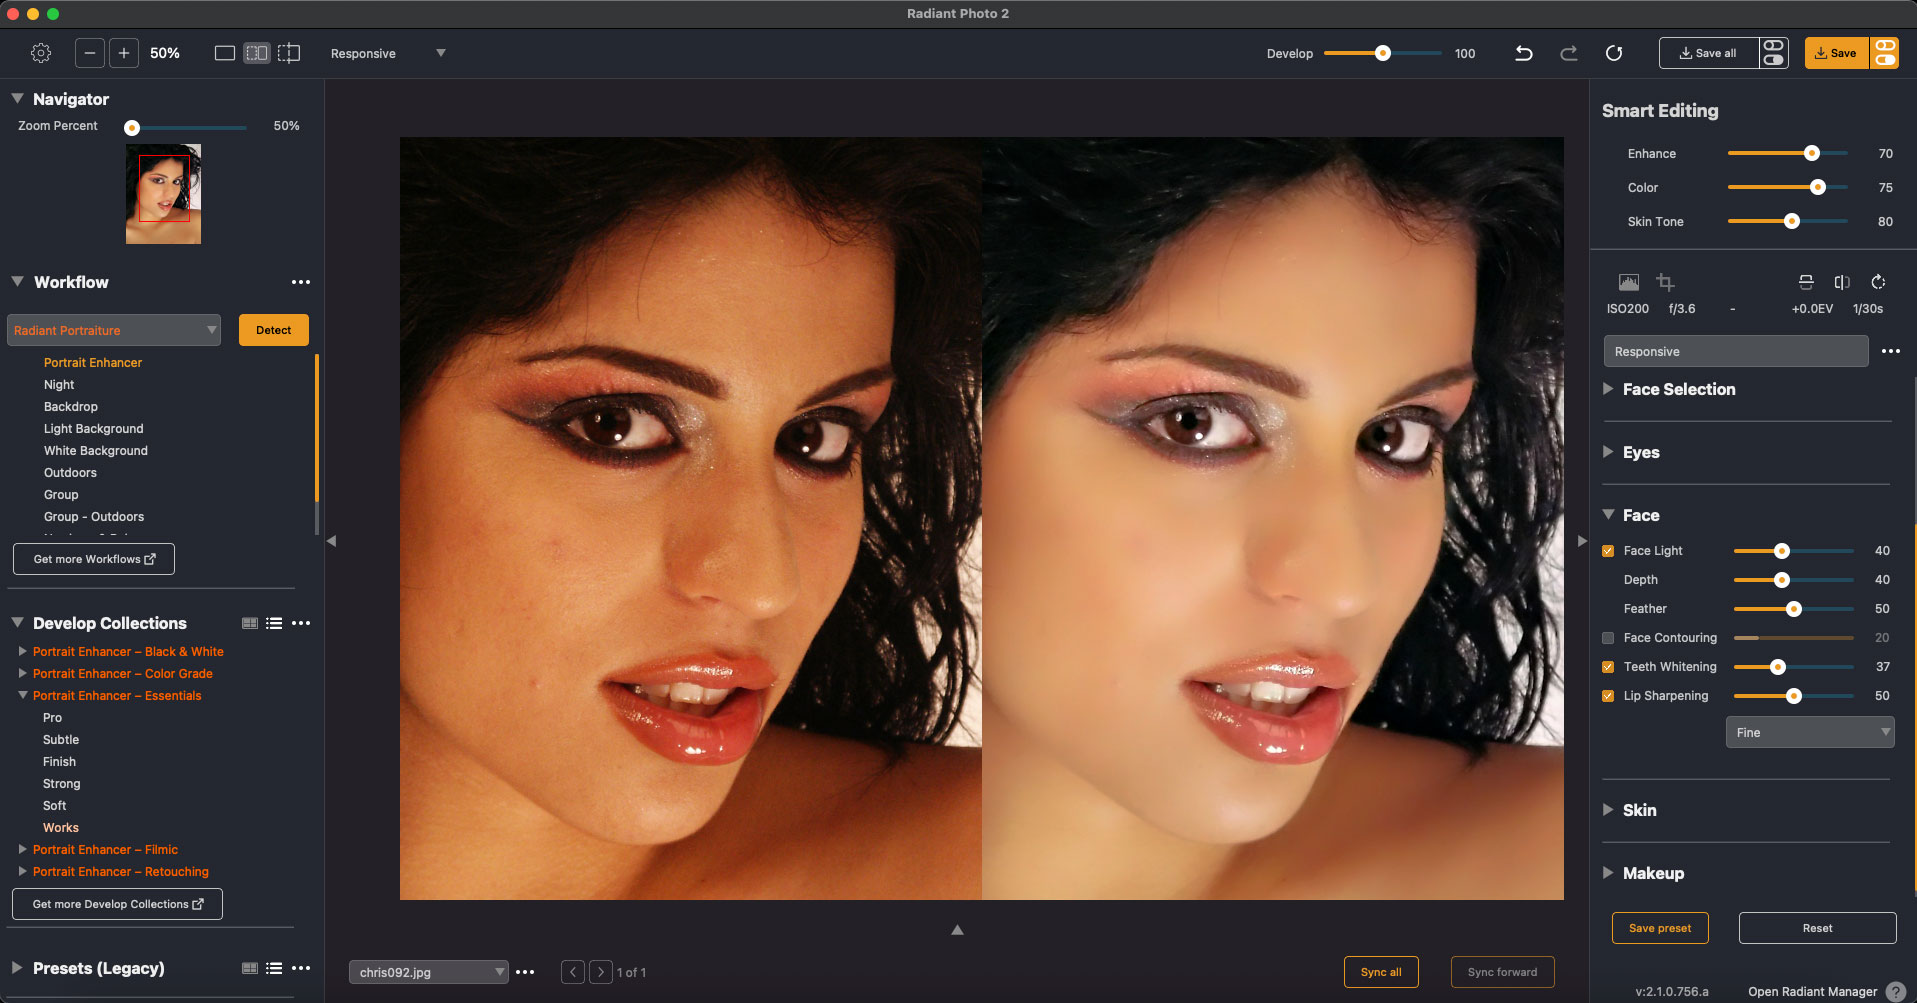
The last digital example is a studio portrait shot only by the modeling lights (the stupid camera did not have a hot shoe or flash sync connector…). The “Radiant Portraiture Workflow” saved the day with color correction as well as specific enhancements for Face, Skin, Eyes, Teeth and Makeup:
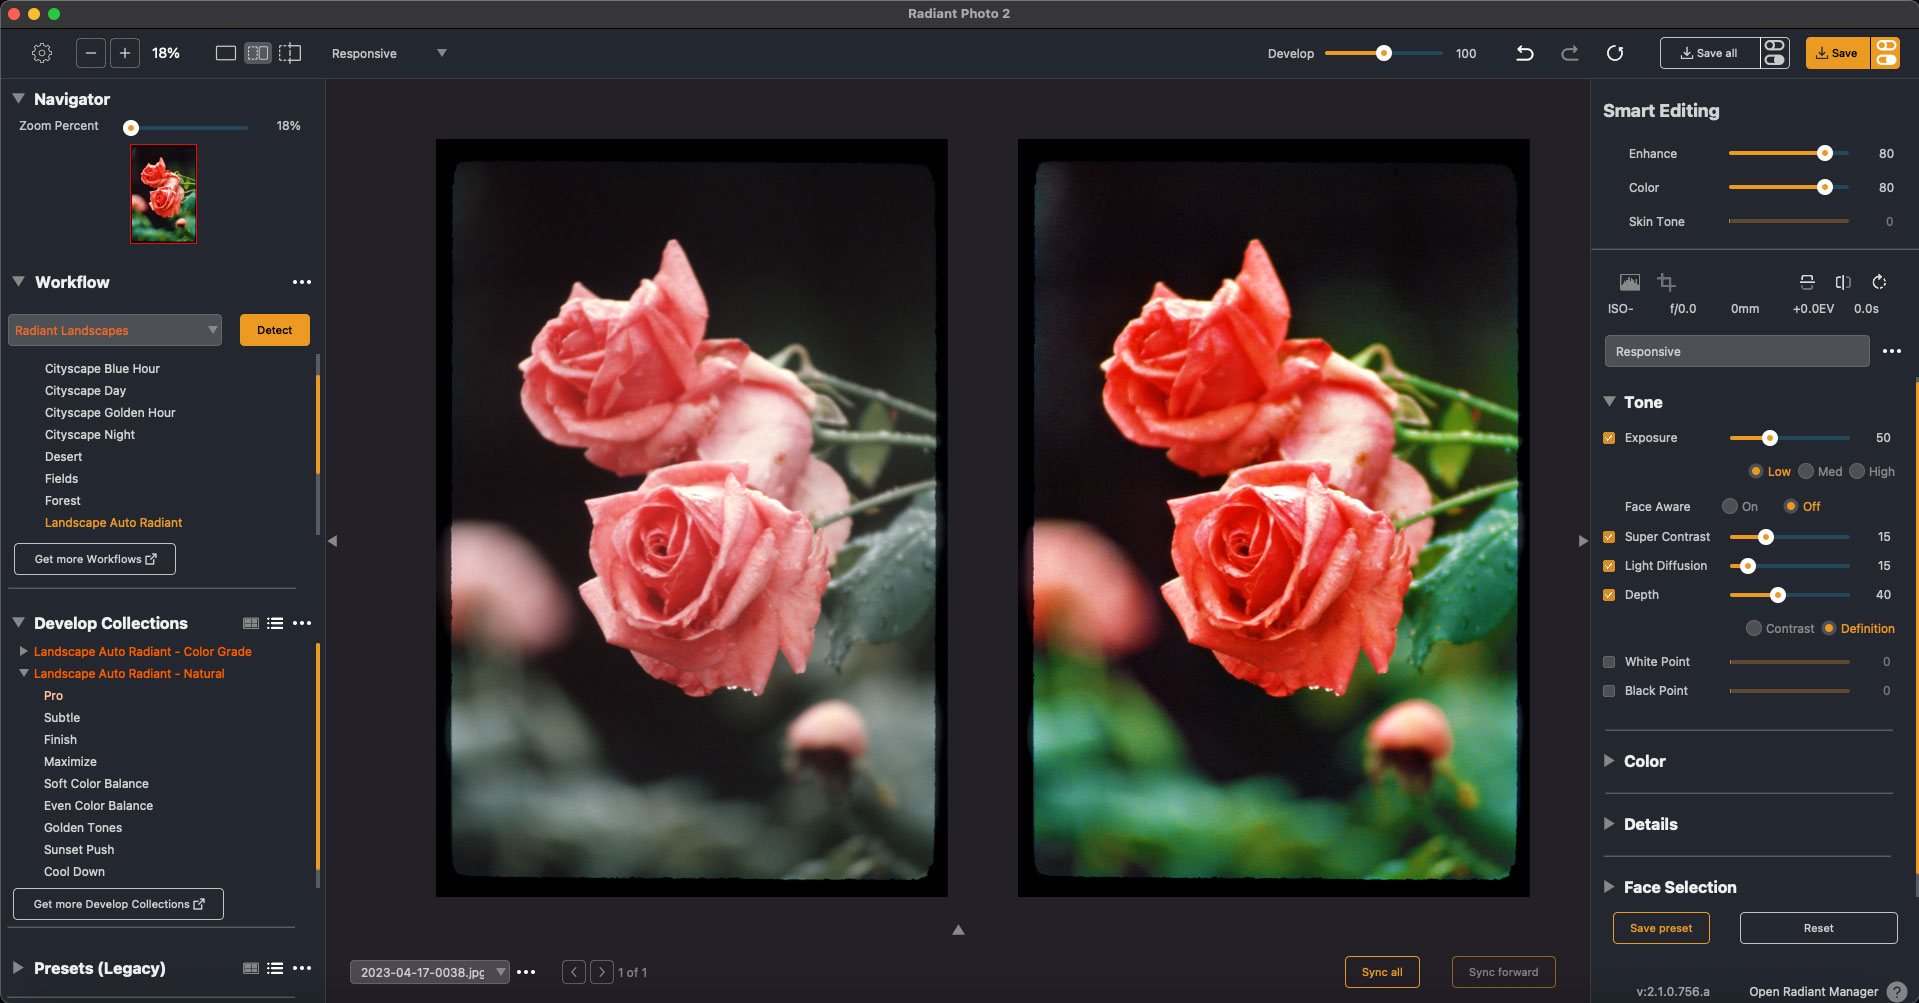
Now things get even worse technically as we dive deeper into my photographic history with shots taken on 35mm slide and negative film! The first example of the roses was shot in 1982 on slide film. Radiant Photo 2 defaulted to “Landscape Auto Radiant” and I adjusted the Tone a bit to restore richer color back into the roses and leaves:
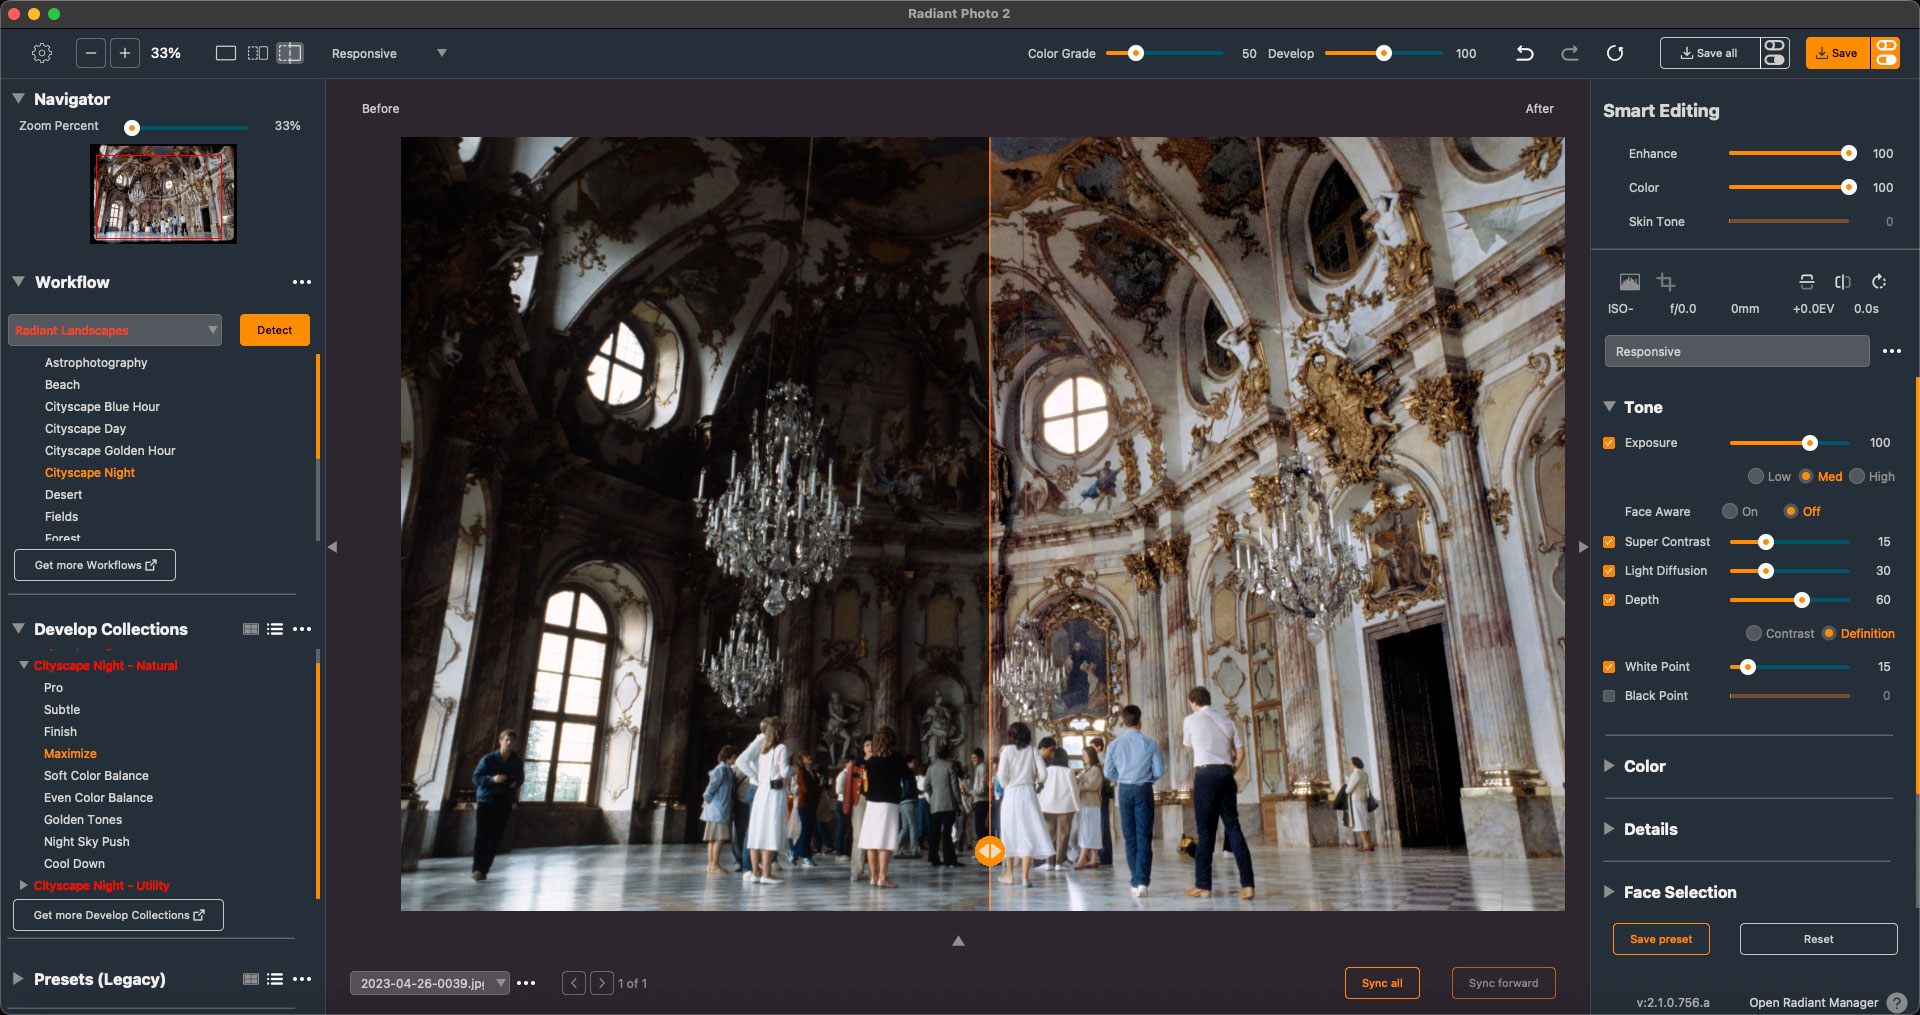
This European palace interior was shot in 1985, also on slide film, with only available window-light struggling to illuminate the large room. Not a problem, as Radiant Photo 2 used its “Cityscape Night” preset to flood the room with a bright, soft glow:
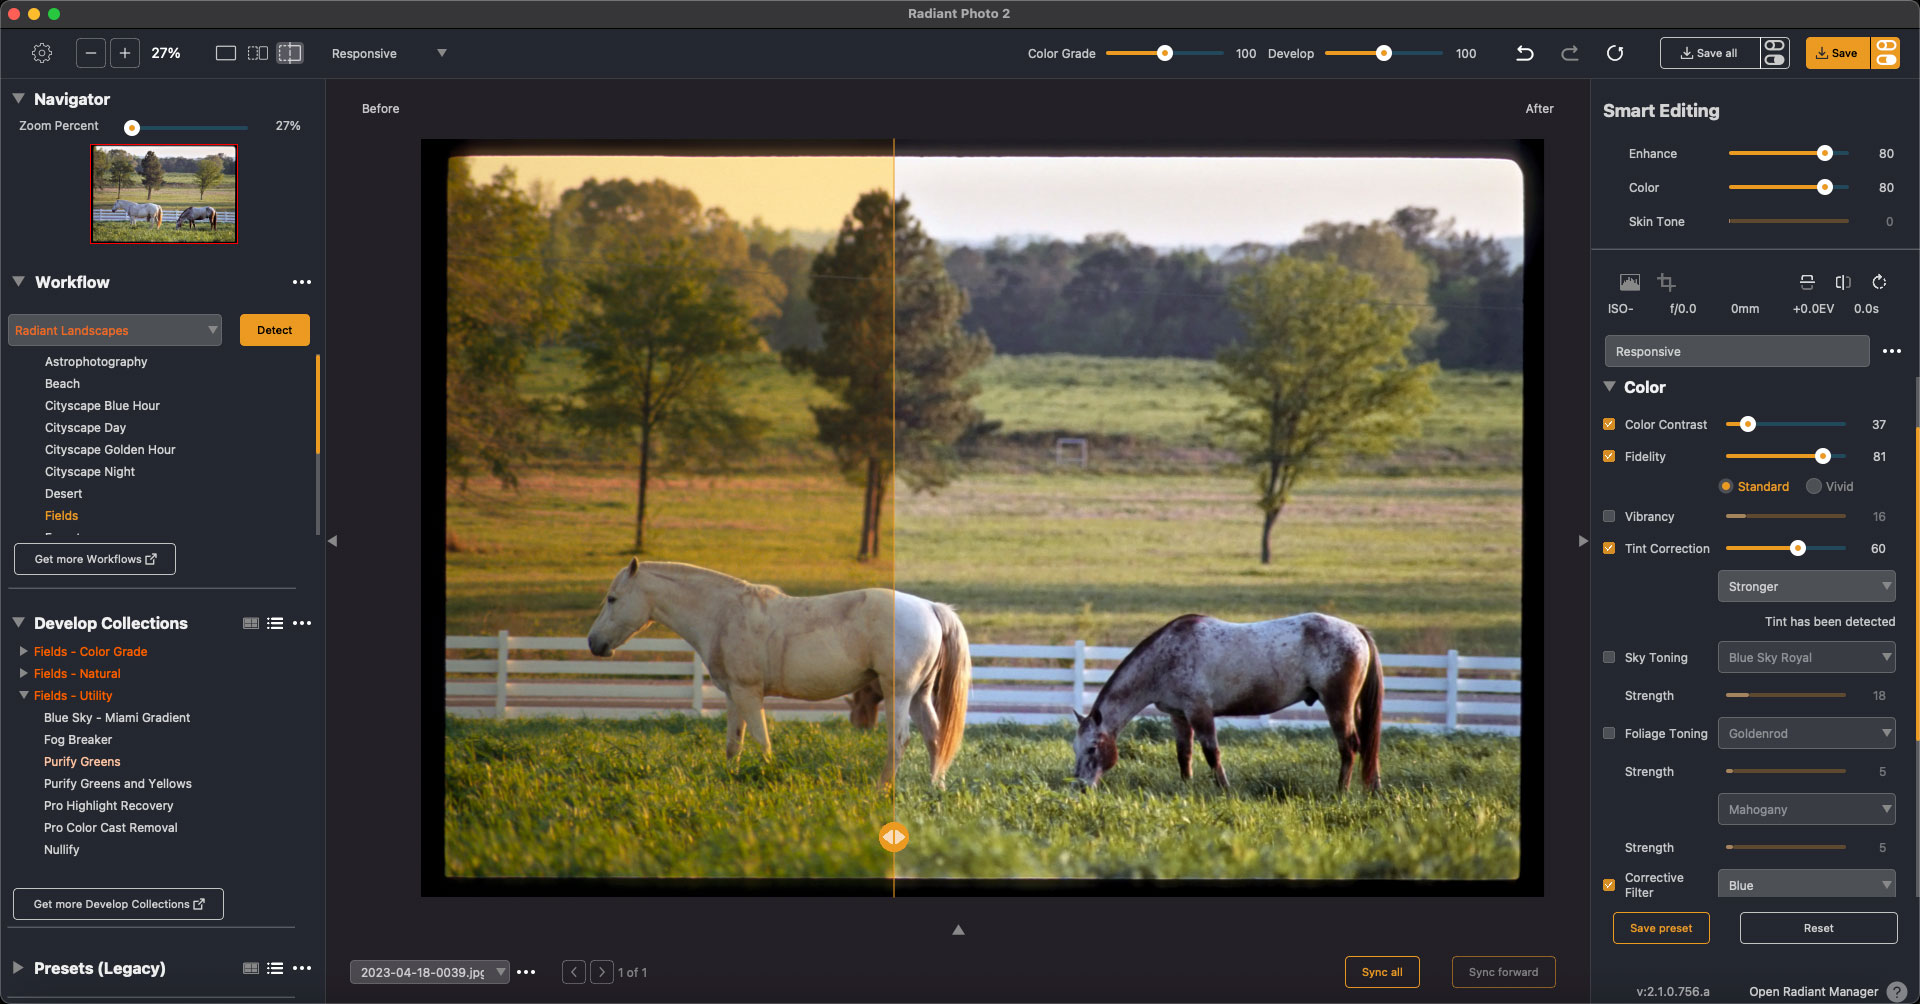
This early-1990s slide of horses in East Texas was always too yellow/golden for my taste. Radiant Photo 2‘s “Radiant Landscapes”>Field setting took care of that quickly, along with some manual settings of my own:
35mm slides are bad enough, but here come the 1990’s color negatives! Before I was using the cheap consumer digital camera described above, I was often using cheap color negative film in my 35mm… I scanned these negatives myself years later in a Nikon Coolscan IV, but sometimes the color was just not right.
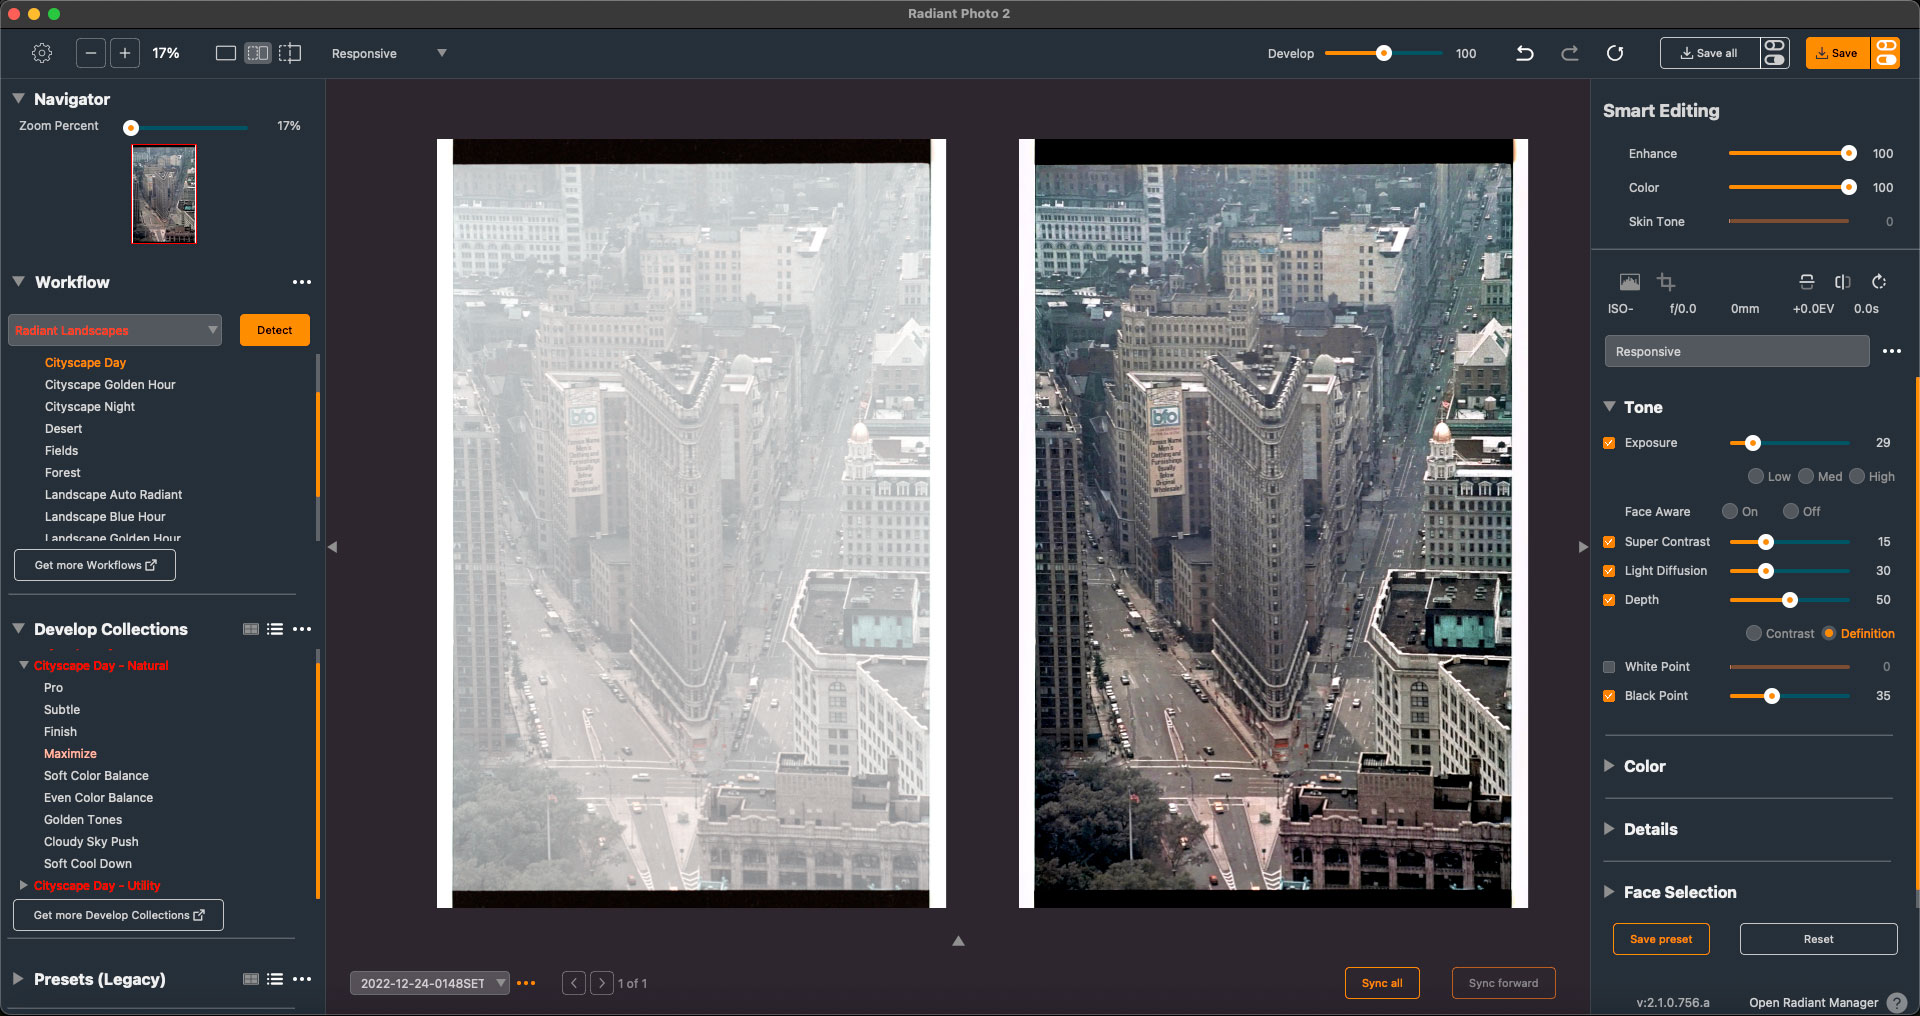
This view of the Flatiron Building in New York City is a perfect example. The presence of the edges of the film in the original scan threw off the scanning software’s exposure, but using Radiant Photo 2 and its Cityscape preset I was able to fully recover the image:
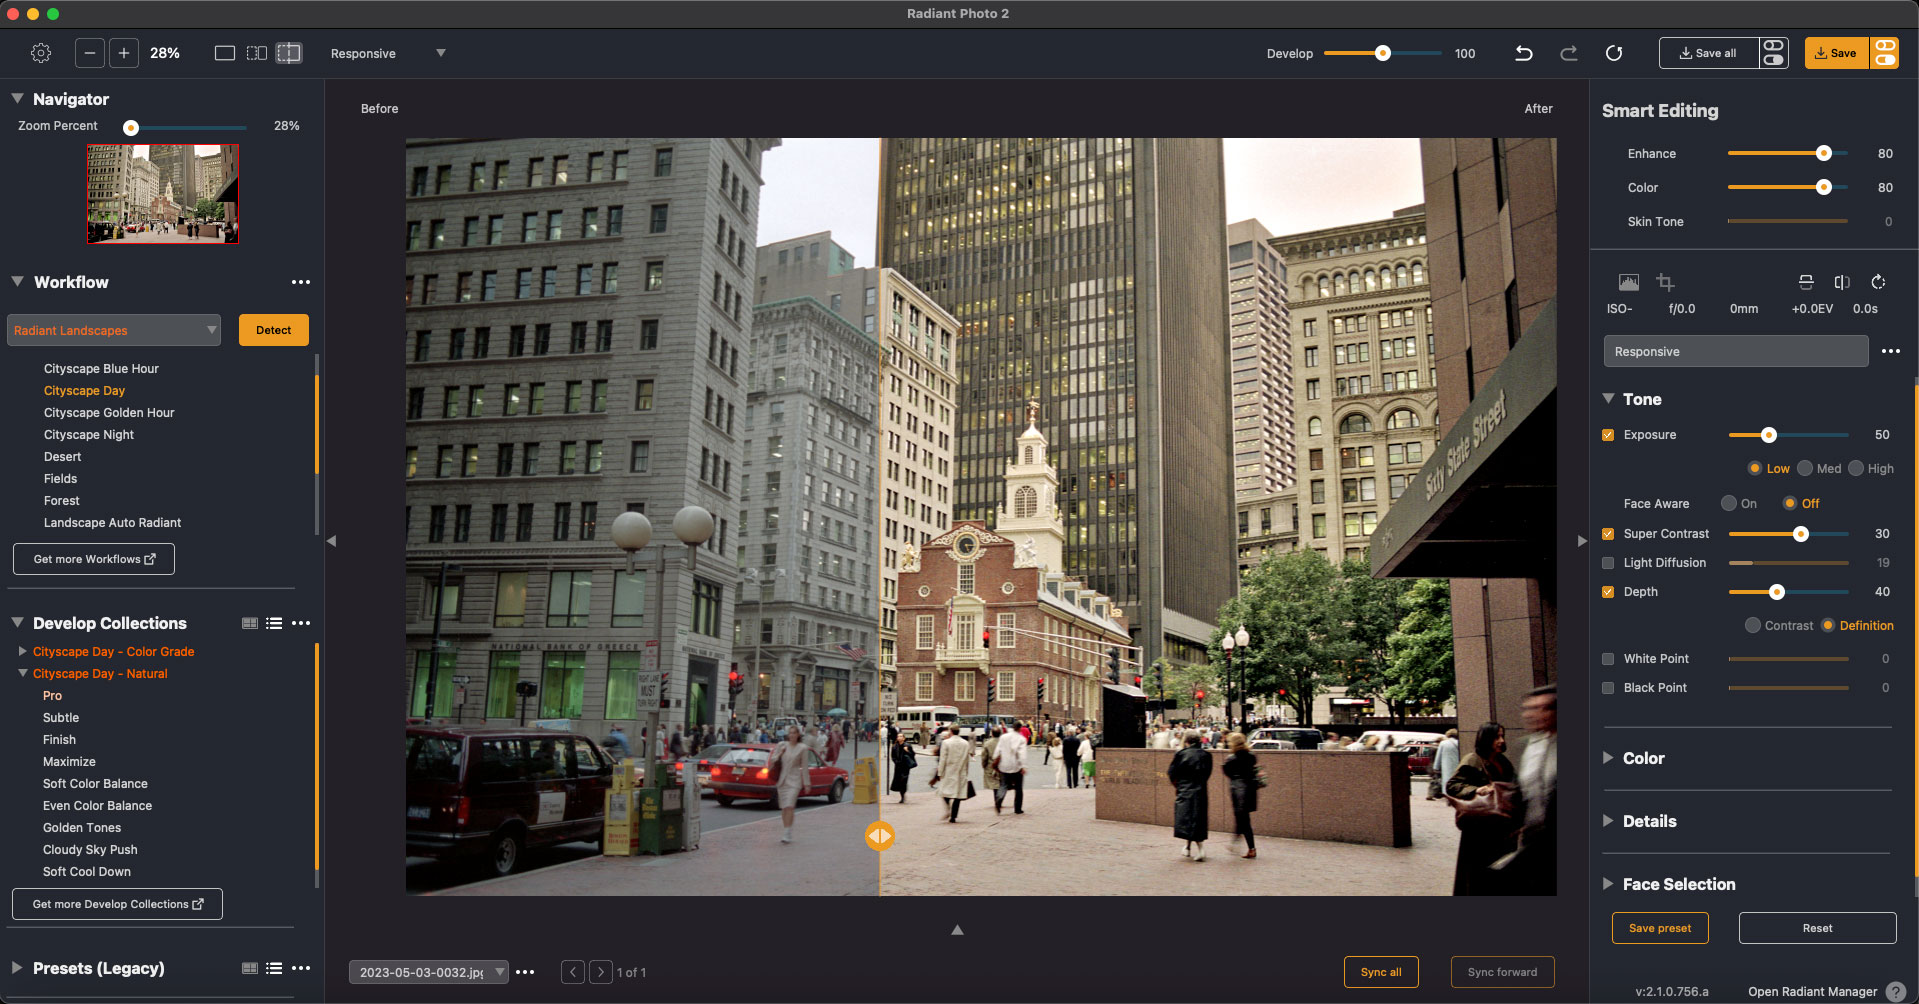
Meanwhile up in Boston, this scan of the Old State House (which, it turns out, was built with the help of one of my ancestors!) was dull and strange looking. Radiant Photo 2‘s “Cityscape Day” preset cut through the murk and made this image much more presentable:
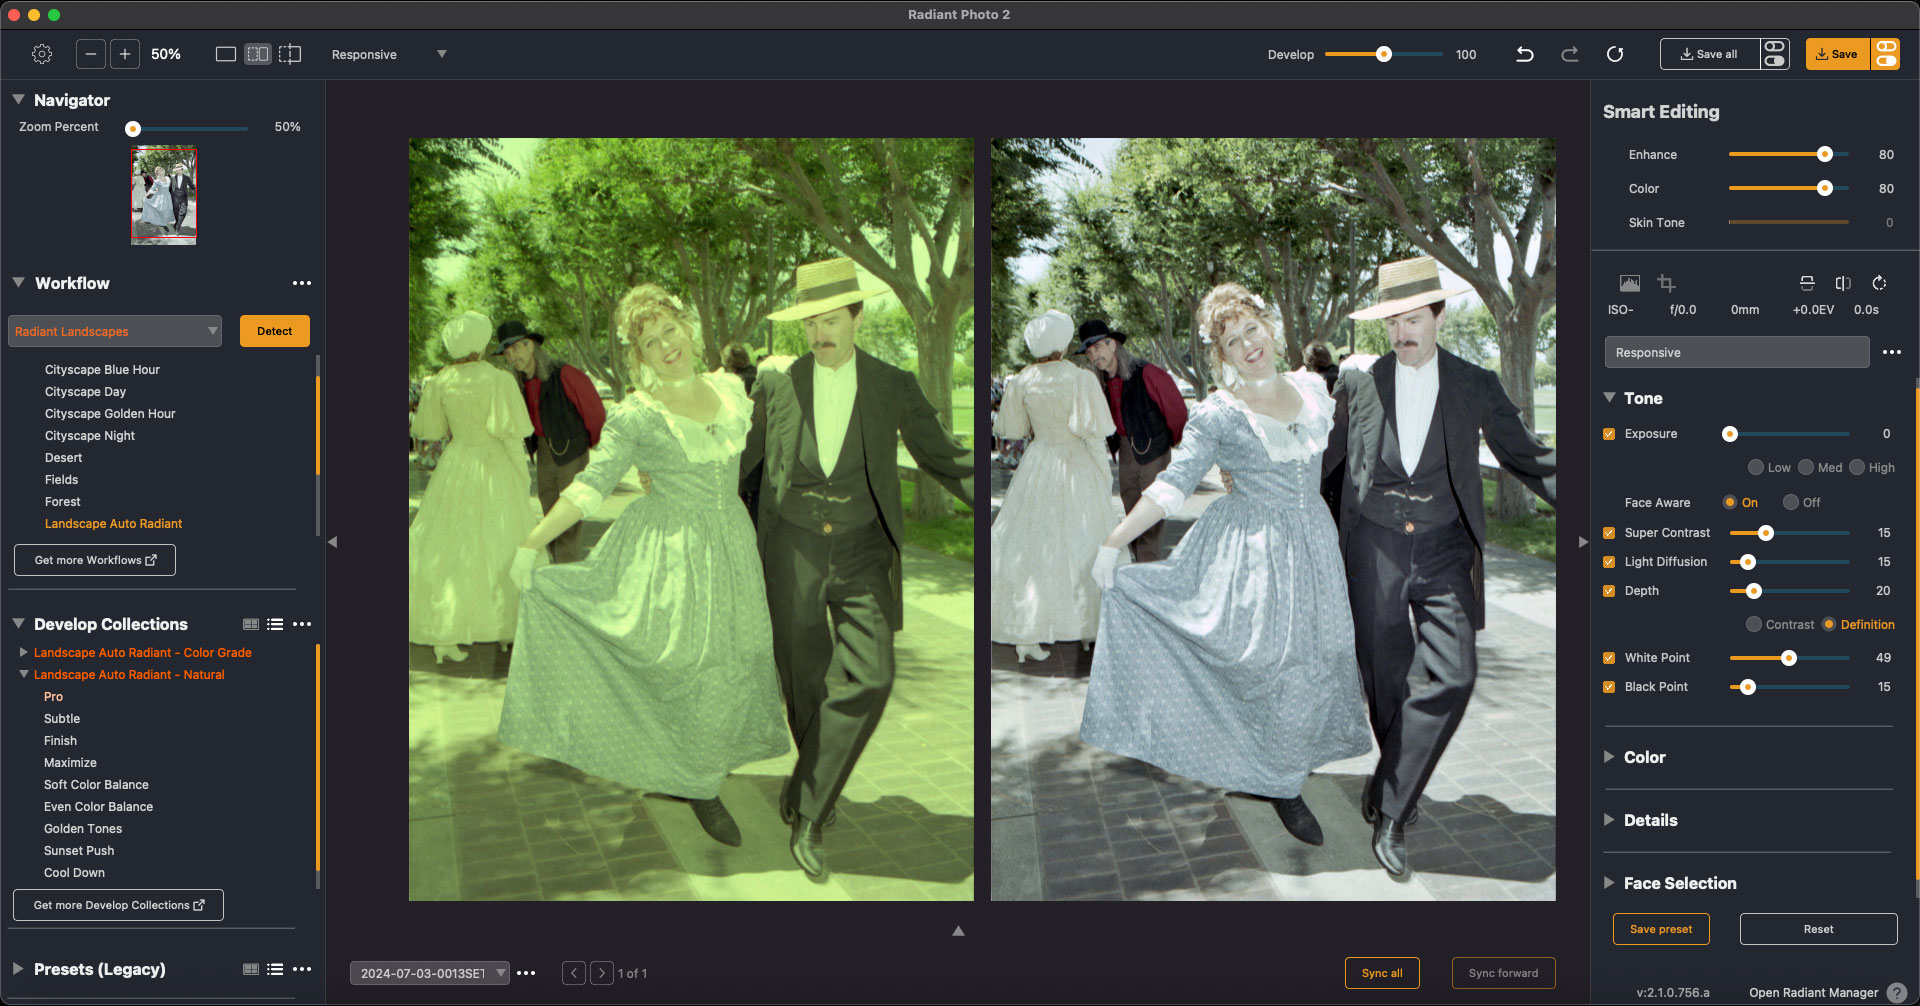
The final sad film scan came out all yellow for some reason, but no problem, it’s easily fixed in Radiant Photo 2! It defaulted to the Landscape Auto Radiant preset which I further tweaked until these historical actors lost their sickly lustre:
So if you’re already familiar with Radiant Photo but haven’t tried the new version 2, you’ll want to do that ASAP! It’s got new, powerful tools such as face detection, creative color grading, 26 new film emulations, Workflow modules and many other creative options.