
Everybody’s favorite Topaz product, Gigapixel, just received a major update to version 3! For existing customers, this update is FREE (as are ALL of Topaz’s updates). For new users, there is an unadvertised 15% discount on Gigapixel as well as any other Topaz product with our coupon code.
Let’s take look at what’s new here! As a reminder, here are some screenshots of version 2 from an earlier blog post. Now, here’s the revamped interface of version 3.0.3 as it looks just after you drag in or open an image:
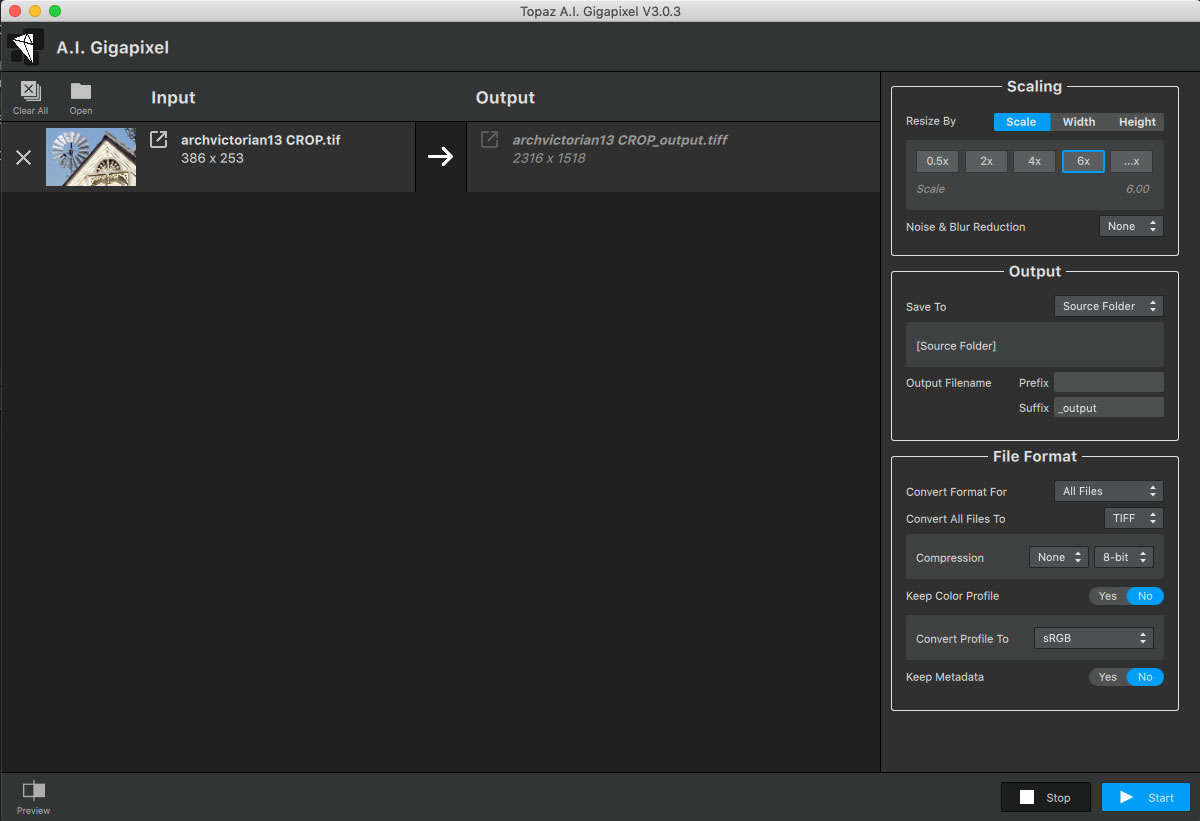
You’ll see three main sections at right beginning with how much to upscale your image (which is the whole point of Gigpixel!) and at what level of noise and blur reduction. If you choose the manual width/height options, you can work in pixels, inches or centimeters. The Output section offers a choice of destination (original source folder or any other) and file name prefix/suffix. Under File Format you can choose to convert any type of file or just RAW ones, output to JPEG, TIFF or PNG with choice of quality relevant to each file format, and fine tuning such as keeping the existing or adjusting the color profile, then whether or not to preserve metadata.
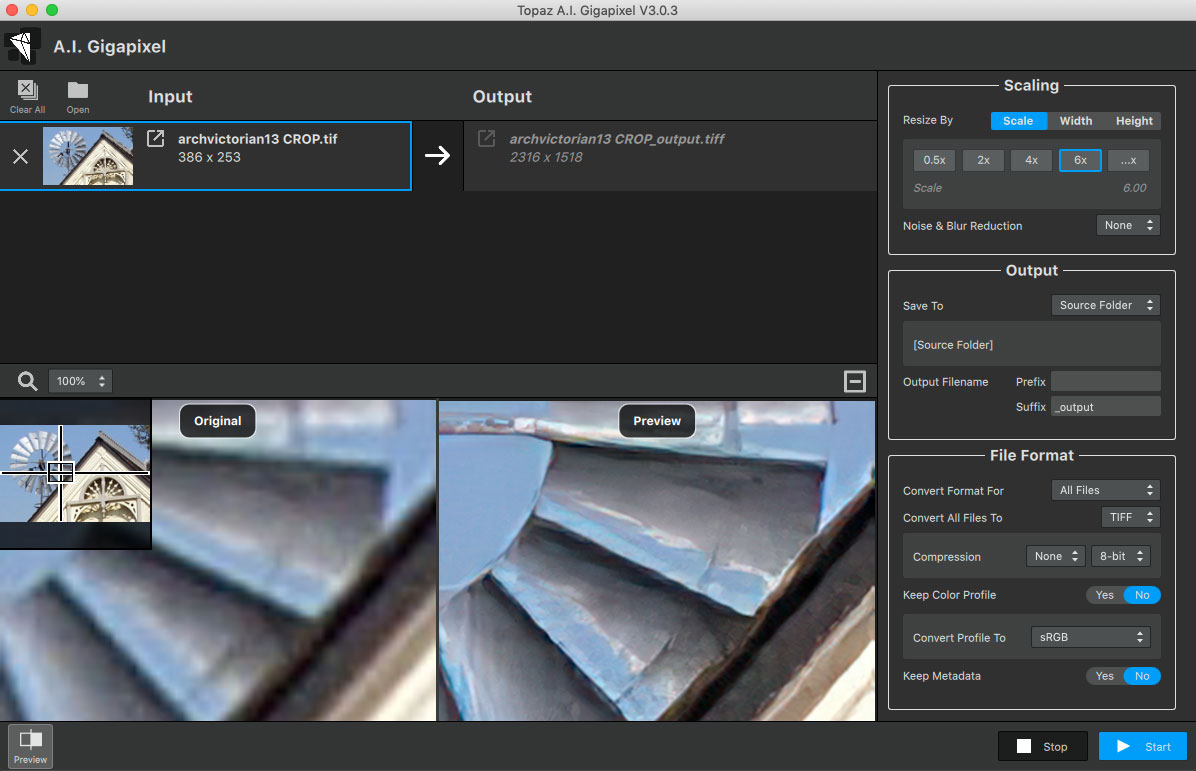
Hidden way over at lower left is a really fantastic new feature: Preview. Normally, you would have to run tests on each of your images to see how they would turn out, and that takes time, of course. But now, you can see an actual preview of any pinpointed area of your source image, at any of several magnification levels.
So let’s get started! Gigapixel loves a challenge, so I always pull out my old files!
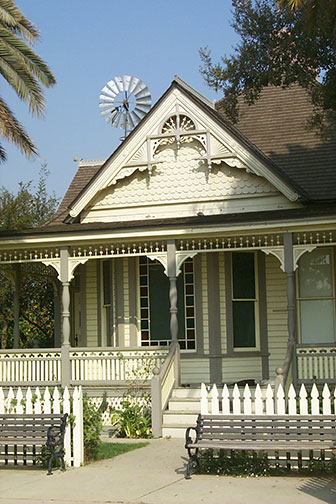
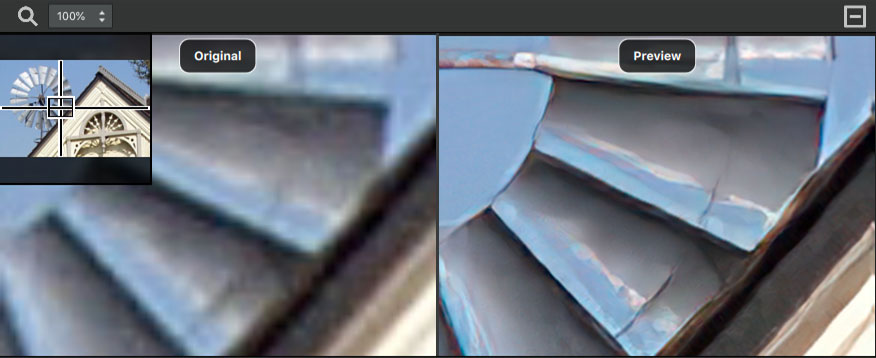
Here is a 1-megapixel 1999 image, shown full-frame but reduced for reference here. (Yes, I always held that camera crooked…) We are going to concentrate on the windmill section of the image:
Here is a crop of the image as dragged into Gigapixel showing how a 6x enlargement would look with no Noise & Blur Reduction. The preview takes seconds; no need to run the entire rendering process first:
And here we see how Low and High levels of noise and blur reduction would look on the same image, before committing to running the full render process:

Refer back to the full-frame view of this image to see what a small area is being worked with, and how clean the upscaled results will be! I never tire of running images through Gigapixel…
Note: For existing customers, this Gigapixel 3 update is FREE (as are ALL of Topaz’s updates). For new users, there is an unadvertised 15% discount on Gigapixel as well as any other Topaz product with our coupon code.
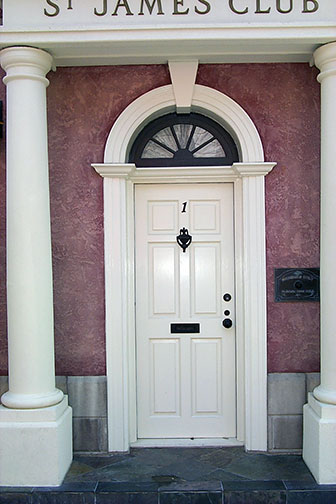
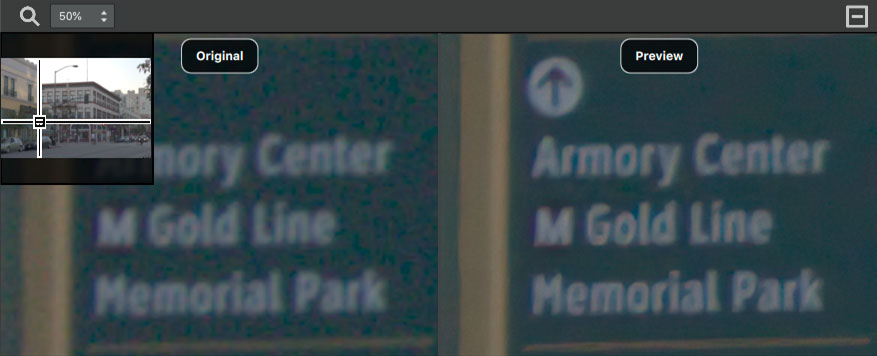
Here’s our next full-frame 1-megapixel image, also from 1999 (and also crooked):
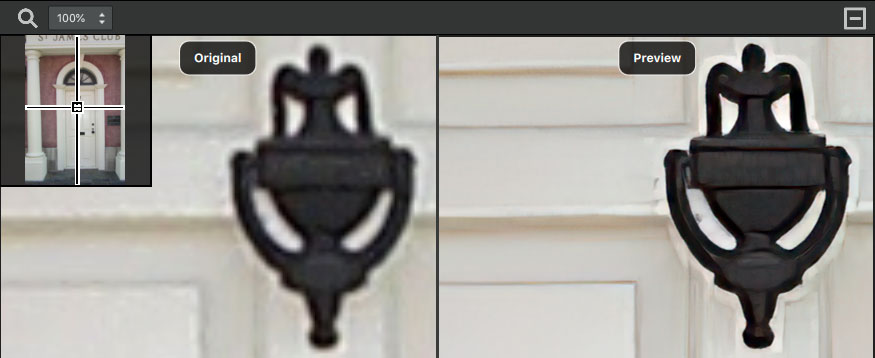
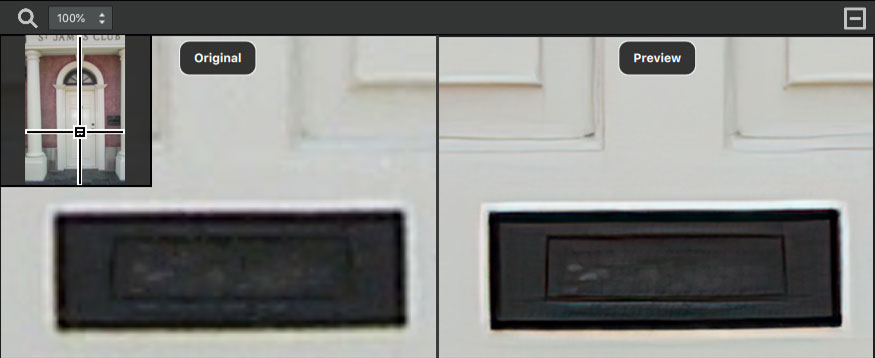
Now let’s see how the knocker and mail slot look at 6x (600%) in the Gigapixel preview:
The incredible clarity in the upscaled versions reminds me of a Norman Rockwell photo-realistic painting! Imagine the whole frame blown up this way and hung on the wall. No longer are your old, soft, lo-res images relegated to the forgotten deep corners of your hard drive – they are very relevant again.
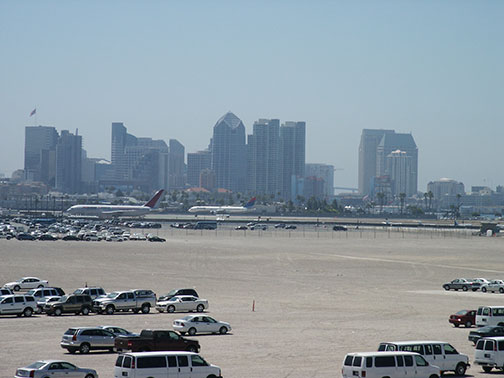
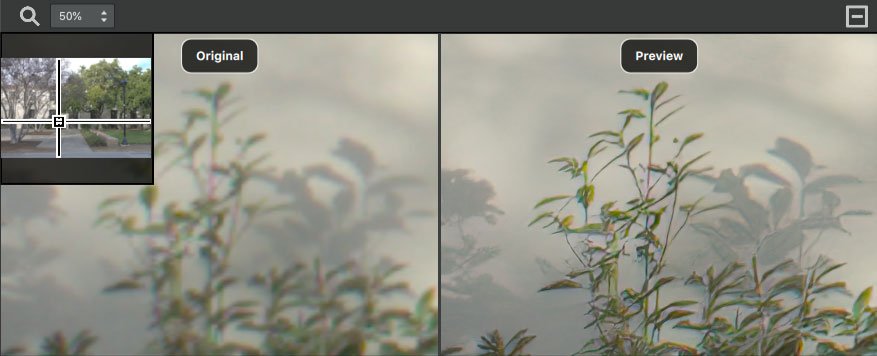
Now let’s move up to 2006 and the 4-megapixel Minolta Dimage revolution, ha! Here’s an uncropped, unretouched (reduced for reference) view of the San Diego skyline poking out of the airport and parking lot:
Let’s work at 6x in Gigapixel at the High setting and see how things look by focusing on both a tall building in the center background and a vehicle at lower left in the before-and-after Preview panel:

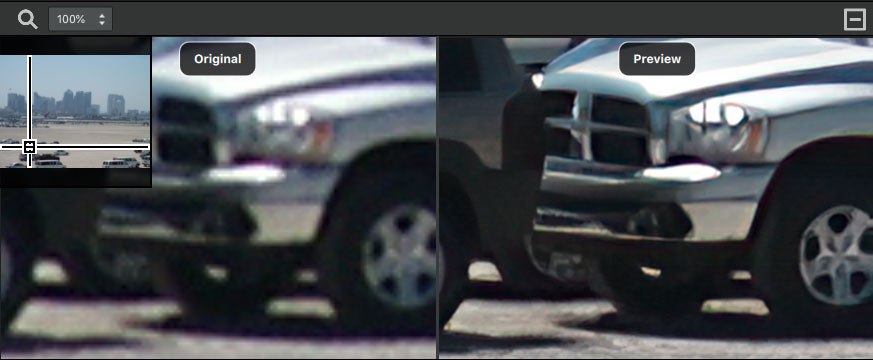
Notice how very clean detail was restored out of the mush! I ran the entire image through Gigapixel because I was amazed at the results, especially with the preview’s restoration of the building details. On my 2013 MacBook Air (I am not bamboozling you with high-end hardware!), the full-image render process took exactly “prepare a bowl of cereal and come back”.
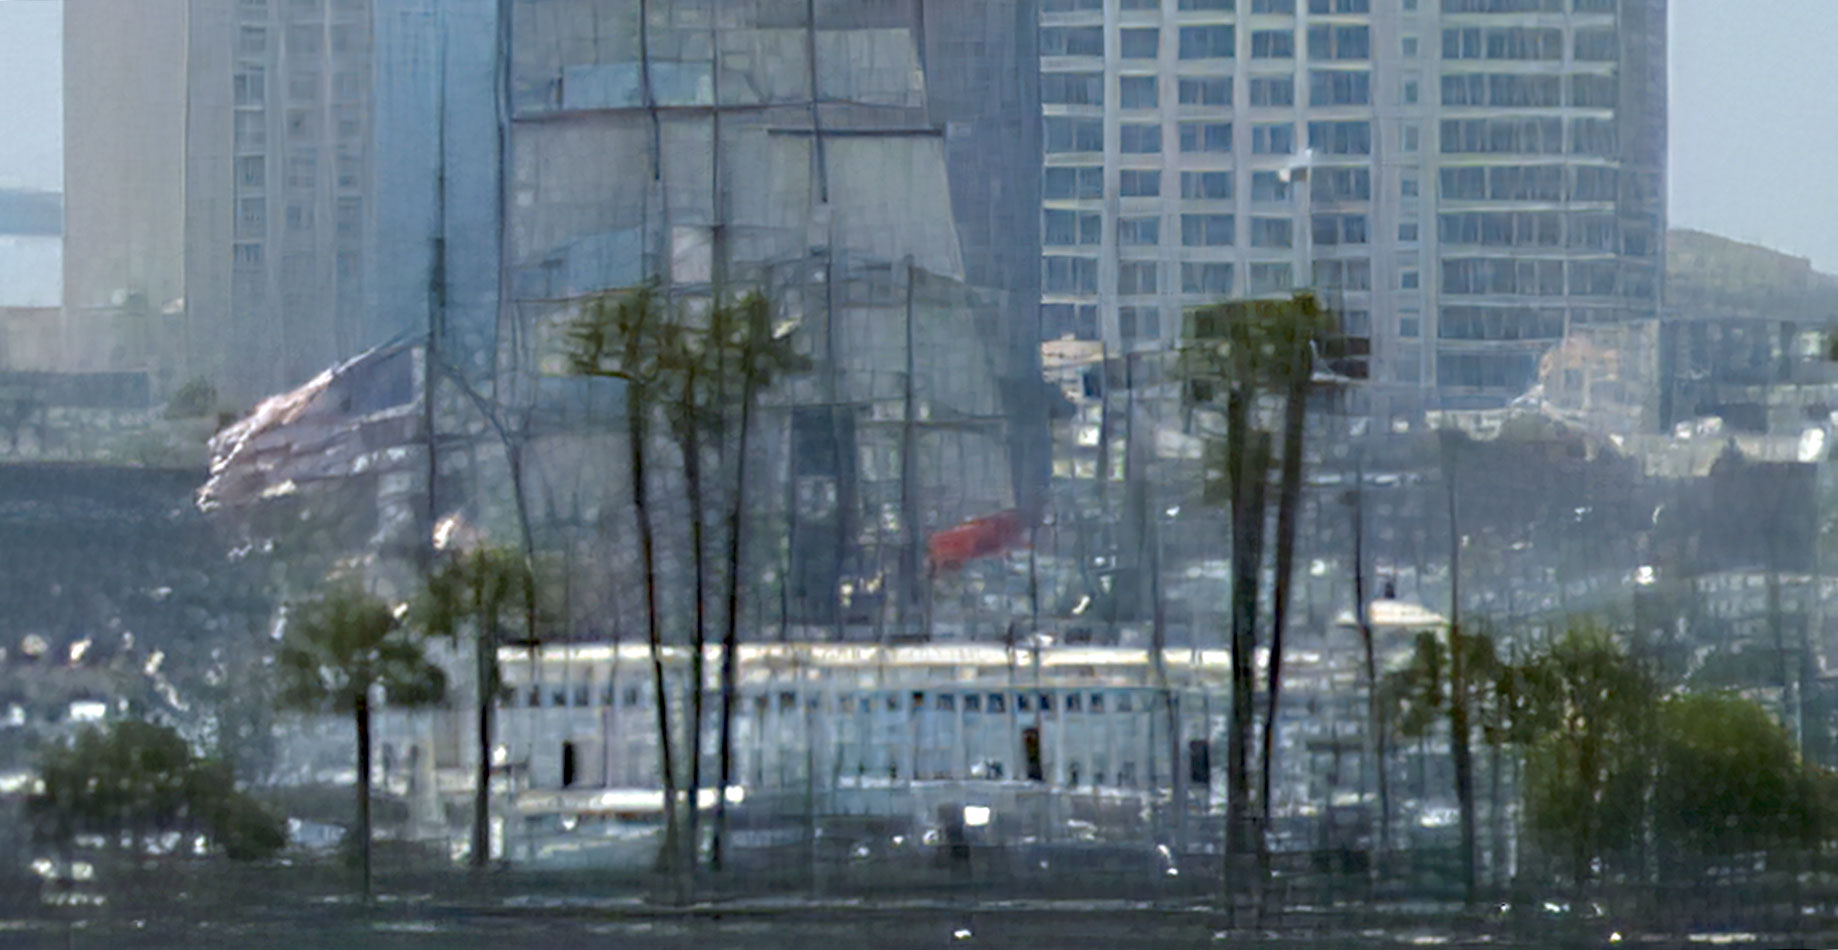
Here are a couple of 100% crops from the final result (open the images in a new tab to view at 100%-size):
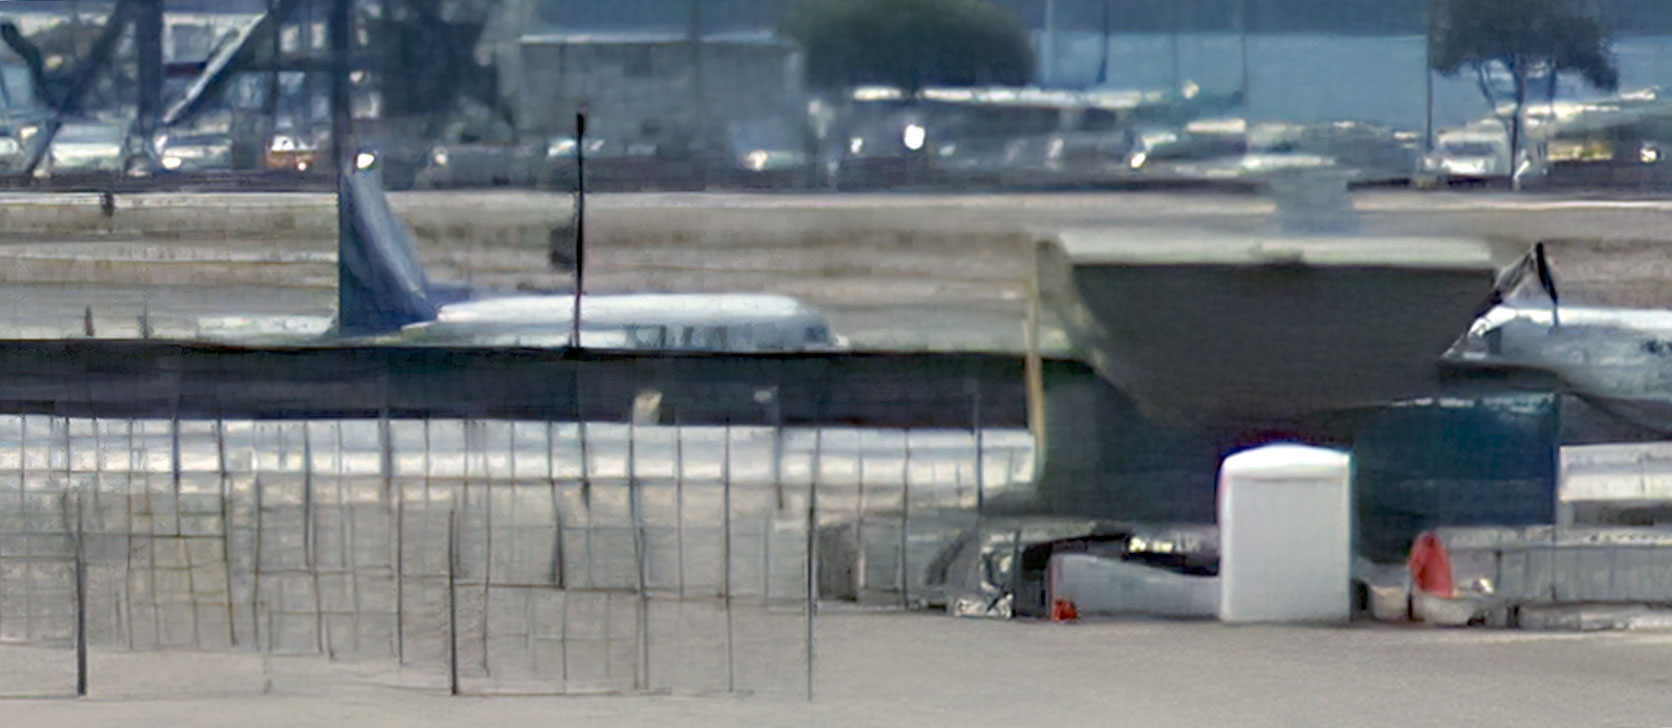
I didn’t realize until I made the enlargement that I captured the 1863 Star Of India sailing ship way in the distance!
Note: For existing customers, this Gigapixel 3 update is FREE (as are ALL of Topaz’s updates). For new users, there is an unadvertised 15% discount on Gigapixel as well as any other Topaz product with our coupon code.
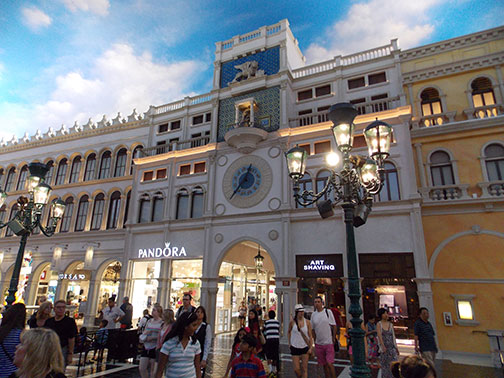
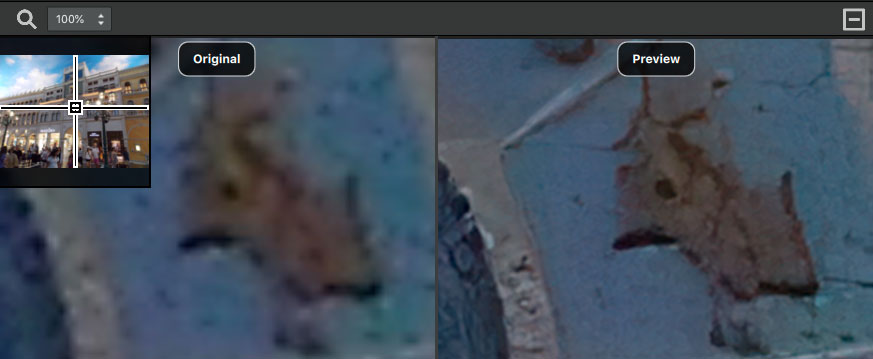
Now let’s jump to 2013 and triple our megapixels to 12 with the Nikon Coolpix L810. We visit the Venetian in Las Vegas and grab some touristy shots. Here’s the full frame image, reduced for reference. We will focus on the clock at the center in our enlargement:
Now, a couple of 6x previews of the clock face in Gigapixel (High setting):

Finally, we reach the Canon Rebel T3 DLSR, which also features 12MP and gives a slightly sharper image than the Nikon, but the results still need “assistance”. As always, here is our reduced-size reference image. The house numbers we shall see in the Gigapixel preview are directly above the doorway in the distance:

And now the 6x enlargement, high setting:

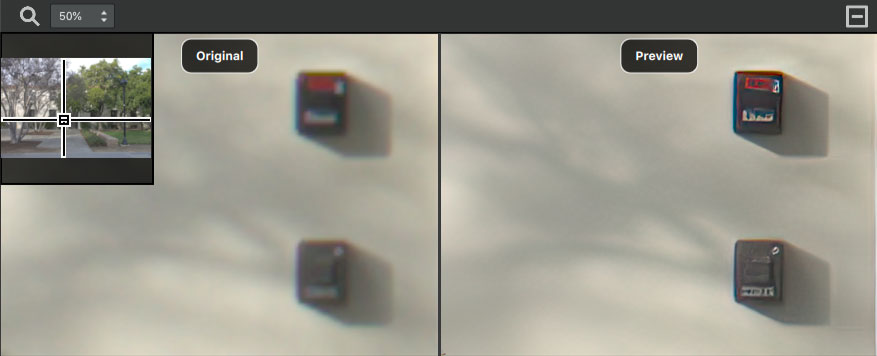
Also using the Canon, here are further examples using (top to bottom) Noise & Blur Reduction set to None, then Low, then High, as appropriate for the subject. The thumbnails show where in the frame the sample is being taken:
And so ends another fun evening’s work with the latest Gigapixel! If you haven’t tried it yet, you really need to. It’s like getting a new camera.
Note: For existing customers, this Gigapixel 3 update is FREE (as are ALL of Topaz’s updates). For new users, there is an unadvertised 15% discount on Gigapixel as well as any other Topaz product with our coupon code.